
Rundocs › Inventory
Transfers
Last updated 2026-09-18
A transfer moves stock from one of your locations to another (one store sends, another receives). Even if you run a single location today, transfers are how you'll move inventory once you open a second.
There is no "require approval before sending transfers" setting to turn off, and nothing to switch to bypass the Requested tab. Whether a transfer stops in Requested (waiting on the source store to approve it) or skips straight to Sent is decided entirely by which option you pick on the Submit menu (Step 4 below), not by any company or per-location setting. If every transfer keeps landing in Requested, you want the Send option, not Request.
In the POS mode, open the Transfers left tab (that's where every transfer lives).
The Transfers list
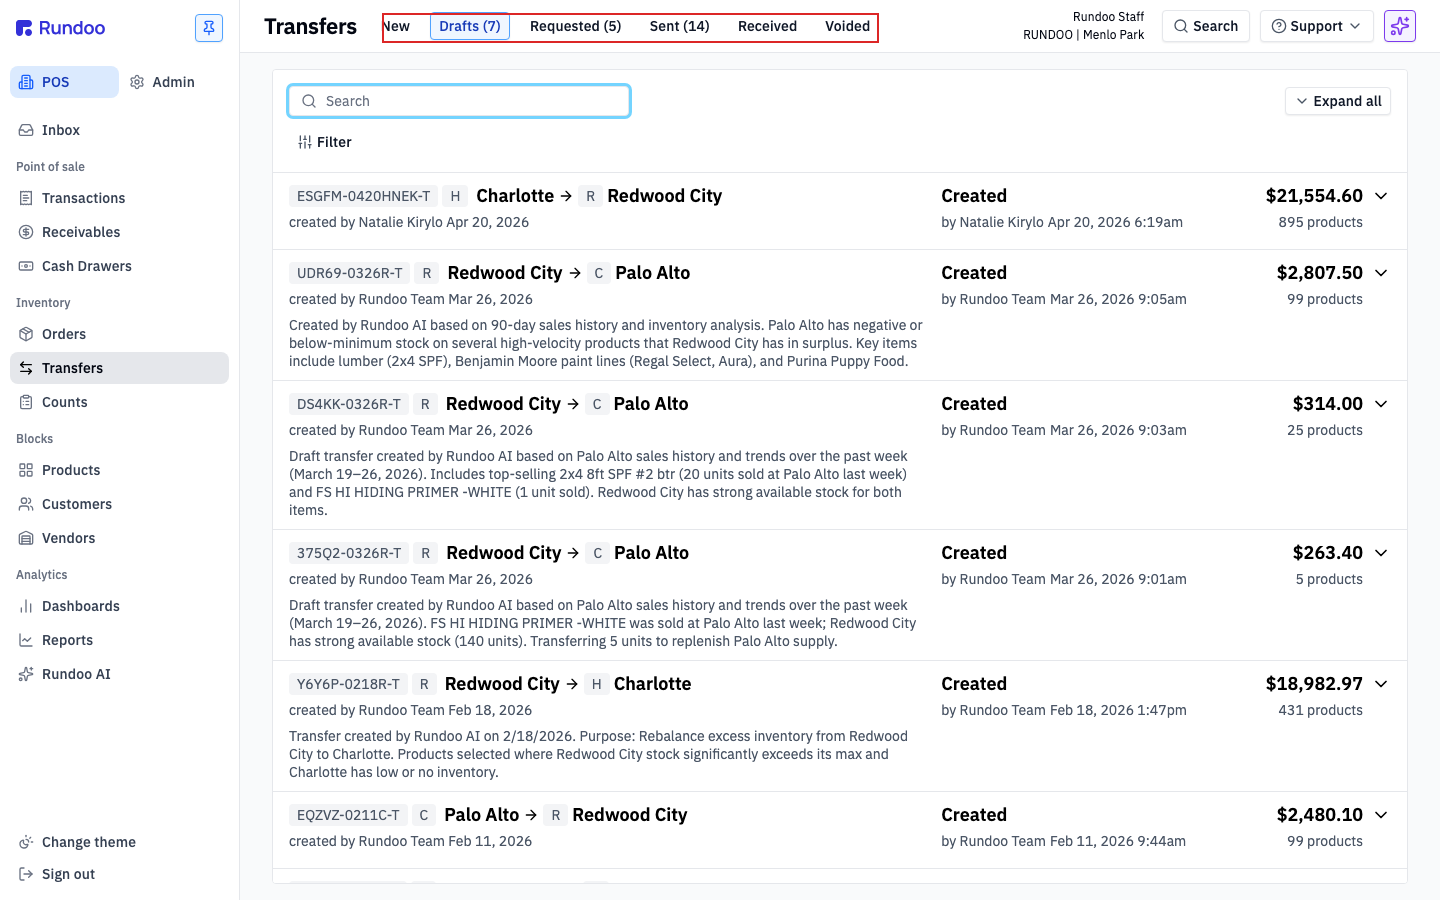
The top-tab strip on Transfers is the lifecycle of a transfer, left to right. Each tab shows a live count of transfers in that state.
-
New(the empty builder); start a fresh transfer here. -
Drafts(in-progress transfers saved but not yet submitted). -
Requested(transfers waiting on approval or fulfillment at the source location). This tab is an optional stop, not a mandatory one; a transfer submitted as Send never lands here. -
Sent. Stock has left the source, in transit to the destination. -
Received. Stock has landed at the destination; counts have been updated on both sides. -
Voided(canceled before completion).
A transfer moves left to right: New → Drafts → Requested → Sent → Received, with Voided as the off-ramp if it gets canceled. Drafts and Requested are both optional stops. Which one a brand-new transfer enters is decided by what you pick on the Submit menu (see Step 4), not by any account setting.
Step 1: Start a new transfer
Open the New top tab (or click Transfers in the left sidebar. It lands you here by default). You'll see the transfer transaction-builder: Transfer from and Ship to on the left, product search in the middle, totals on the right, and the action cluster at the bottom.
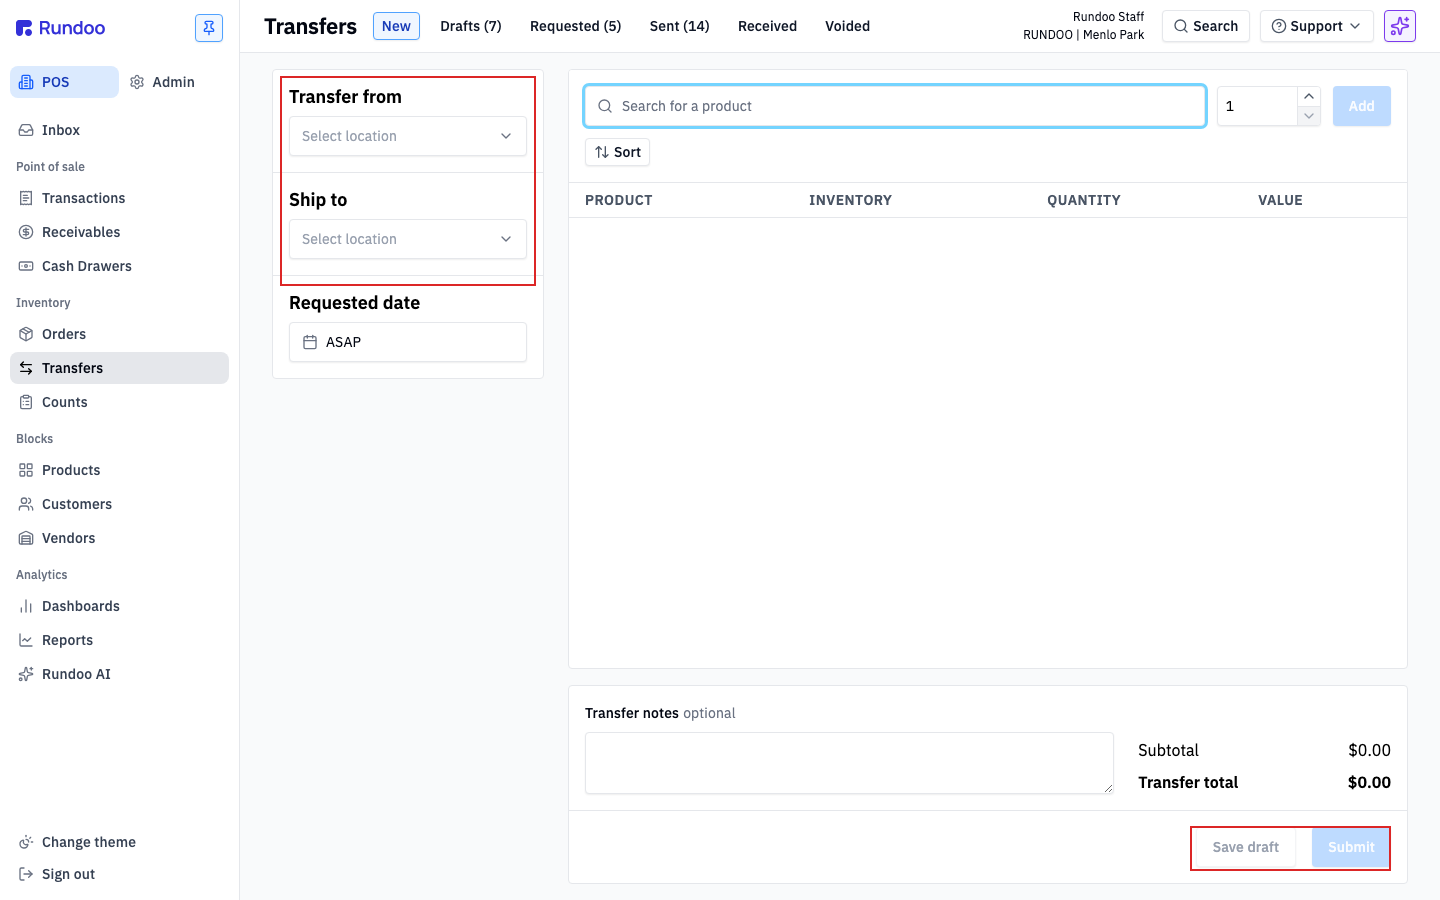
Transfer from and Ship to are both required before the builder will let you submit. Until both are set, the product line-item table is empty and the Submit button is disabled.
Rundoo doesn't flag missing fields when you click Submit or Save draft on a half-filled transfer. The button just does nothing. If nothing happens, double-check you've picked both a source and a destination and added at least one product.
Step 2: Pick source and destination
Click Select location under Transfer from and pick the store that's sending the stock. Then click Select location under Ship to and pick the destination.
-
Transfer from. The store losing stock. Once picked, the store's address appears underneath. -
Ship to(the store receiving stock). Same address treatment. -
Requested date(a target date for the transfer to arrive). Defaults toASAP. -
Generate transfer(a Dooey button) that suggests quantities based on each location's sales velocity and on-hand stock. Click it and the cart fills itself with a proposed transfer. Review the numbers before sending. The button only appears in tenants with Dooey enabled; if it's not visible on yourTransfer frompanel, the feature isn't on for your company yet.
The destination can't be the same as the source; Rundoo won't offer your current source location in the Ship to picker.
Step 3: Add products
Click Search for a product and start typing (matches on SKU, name, or vendor SKU). Use the quantity stepper to the right of the search box to set how many before adding.
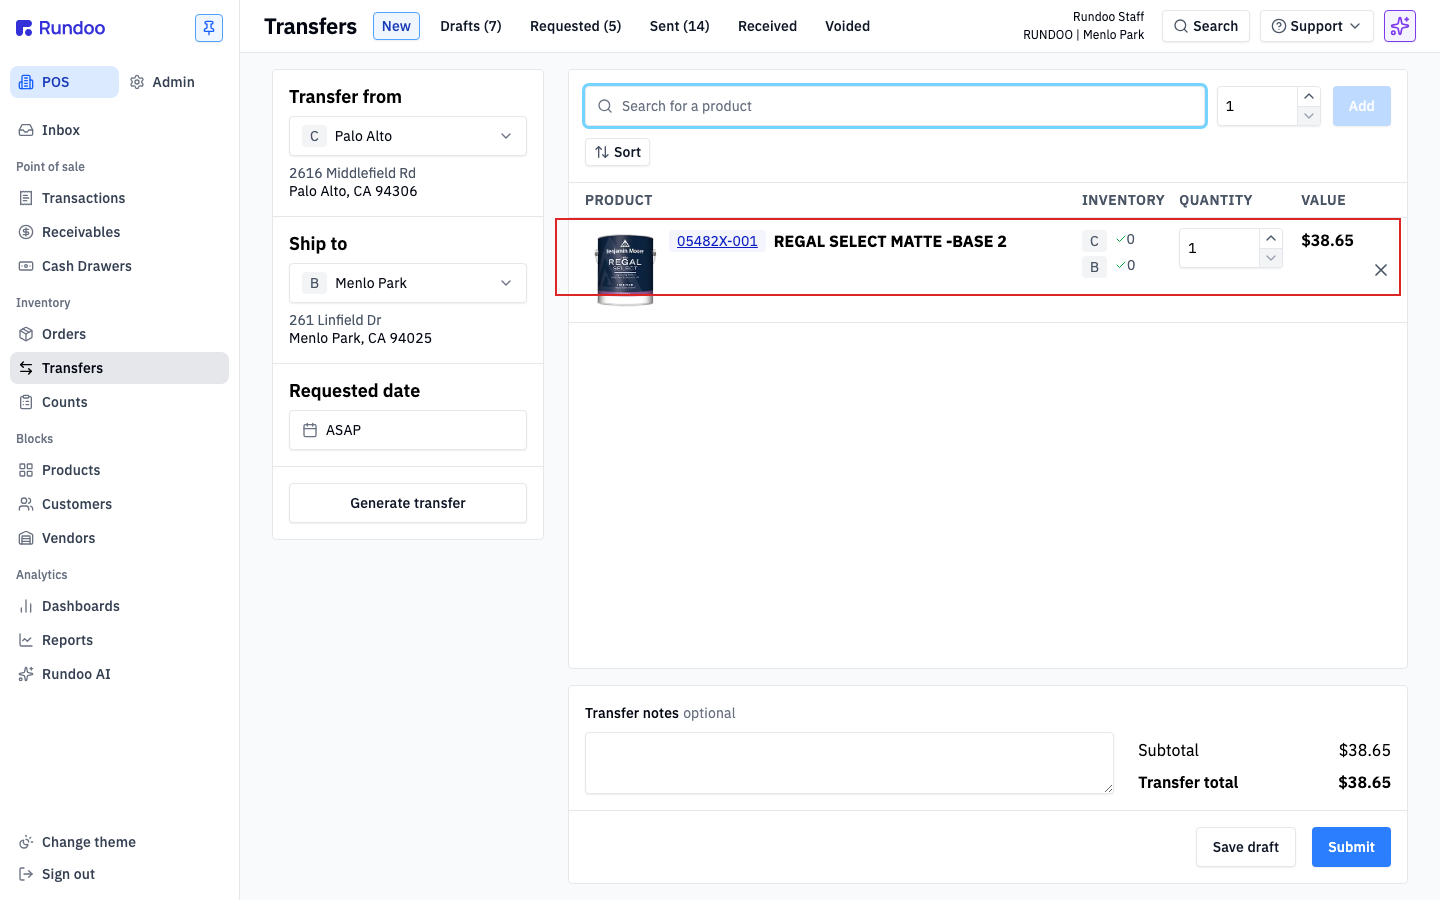
The product search on the transfer page doesn't show a live dropdown the way the Orders page does. Type your query and press Enter to pick the first match, there's no list to browse. If the wrong product lands on the cart, remove it with the ✕ on the line and search more specifically.
Each line fills the table with PRODUCT, INVENTORY, QUANTITY, and VALUE columns.
-
PRODUCTshows the SKU, name, and product image. -
INVENTORYshows on-hand counts at both locations involved (source and destination), each with its location badge. -
QUANTITYis how many units you're moving. Stepper increments by one; click in and type for larger numbers. -
VALUEis the dollar value of the stock in motion: average cost × quantity. Transfers are always valued at average cost, regardless of your company-wide Cost method setting (Average or Standard). Changing that setting has no effect on this column. The unit cost isn't labeled on the transfer page itself, and it updates live as you change the quantity.
Transfer totals at the bottom right show Subtotal and Transfer total (the combined value of every line).
Step 4: Submit the transfer
The action cluster at the bottom right has two controls:

-
Save draft(stash the transfer in theDraftstab without submitting). Safe to come back to later. -
Submit, the primary action. It's a dropdown, not a single-action button. Clicking it opens a short menu, and the item you pick there is what decides which tab the transfer lands in.
The Submit menu offers three choices:
-
Request. Lands the transfer in theRequestedtab. Use this when the source location should confirm and pick the stock before it ships — someone at the sending store still has to open the transfer and click Send. -
Send. SkipsRequestedentirely and lands the transfer straight in theSenttab, as though the stock has already left the source. Use this when you're the person moving the stock and there's nobody to ask. -
Receive. Books the transfer as already delivered, straight intoReceived. Both locations' counts update immediately.
If every transfer you submit keeps landing in Requested, it's because Request is the item being picked on the Submit menu. There is no company-wide or per-location "requires approval" setting to switch off, and nothing to ask Rundoo to enable. Choose Send from the Submit menu instead and the transfer bypasses Requested. Nothing about this is per-location: the same three choices appear on the Submit menu at every one of your stores.
Rundoo drops a green confirmation banner at the bottom of the screen and moves the transfer into the state you picked.
Receiving a transfer
When the stock shows up at the destination, open the transfer from the Sent tab and confirm what actually arrived. The QUANTITY column lets you record each line as "N of N" received. Mark short shipments or damage here so both locations' inventory counts stay honest.
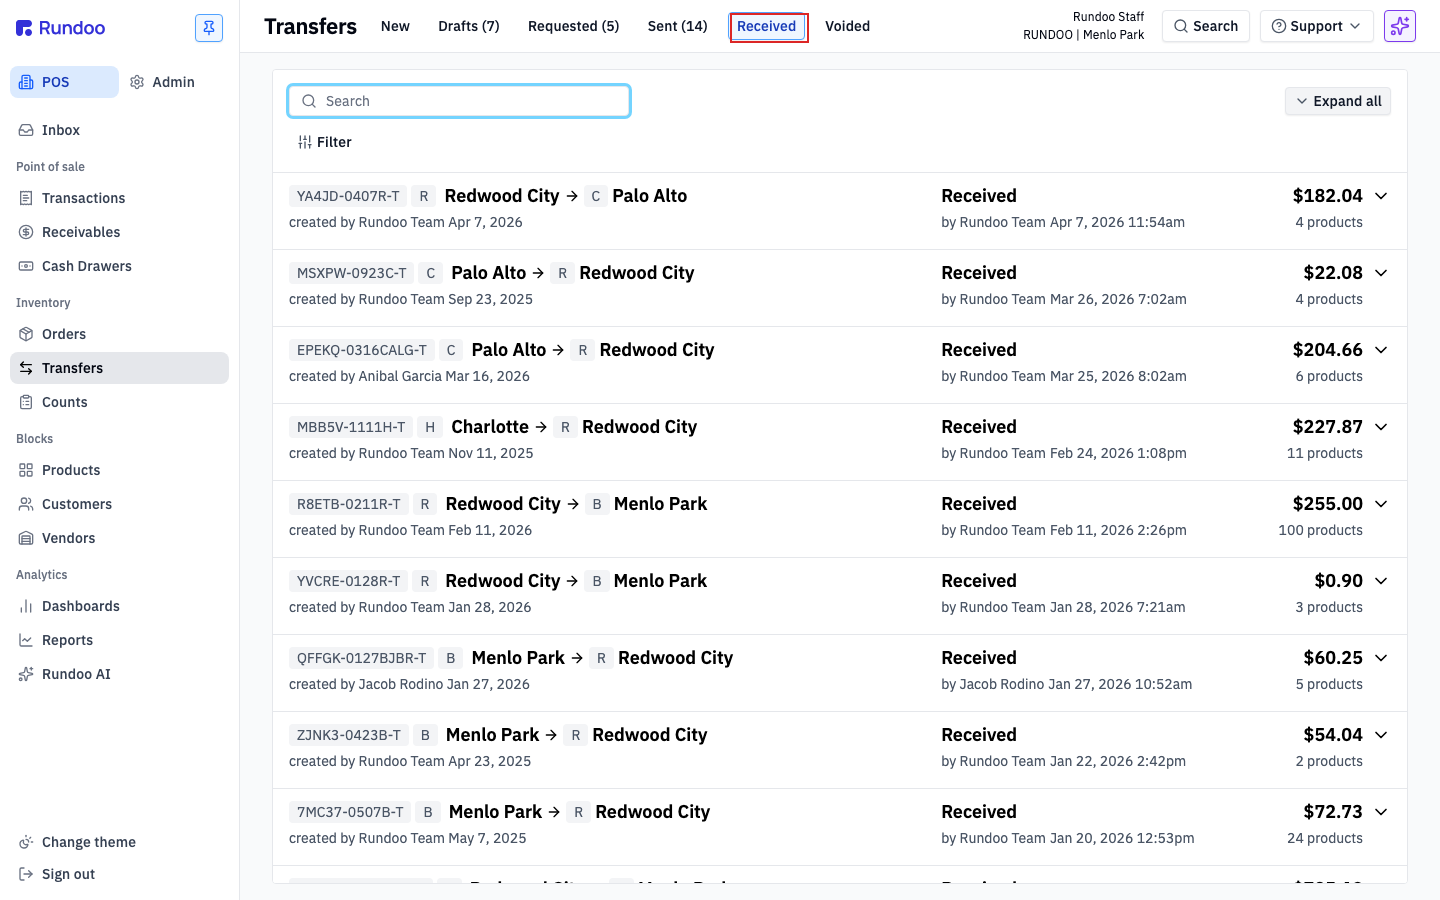
Once receiving is confirmed, the transfer moves into the Received tab. Stock at the destination increments by the received quantity, stock at the source has already been decremented by the sent quantity, and the ledger is square.
Receiving updates on-hand inventory at the destination the moment you confirm. If a shipment is partial, receive only what landed. The remainder stays on the transfer as outstanding so you can receive it when it shows up.
Recommended Rundocs
-
Purchase orders, restocking from a vendor (as opposed to moving stock between your own locations).
-
Products, where product on-hand counts per location are tracked.