
Rundocs › Getting Started
Go-live
Last updated 2026-09-10
Go-live is the moment your store flips from Training mode to Active, after this, every sale, order, and statement in Rundoo is real. Your Rundoo implementation contact runs this process with you; this page is the shared roadmap for the three stages you'll cover together: set up the system, confirm the data we've migrated, and configure the hardware on your counter. It's the between-calls reference, read ahead to see the shape of what's coming, and come back to double-check anything before you flip live.
Stage 1: Set up your system (20 min)
This stage is about getting every person who'll touch Rundoo logged in, with Stripe connected for payments and the mobile apps installed on phones.
Step 1: Sign in to Rundoo
In a web browser (we recommend Google Chrome), go to your Rundoo subdomain (it looks like {yourstore}.rundoo.app). Your implementation contact sent this URL in your welcome email; bookmark it now.
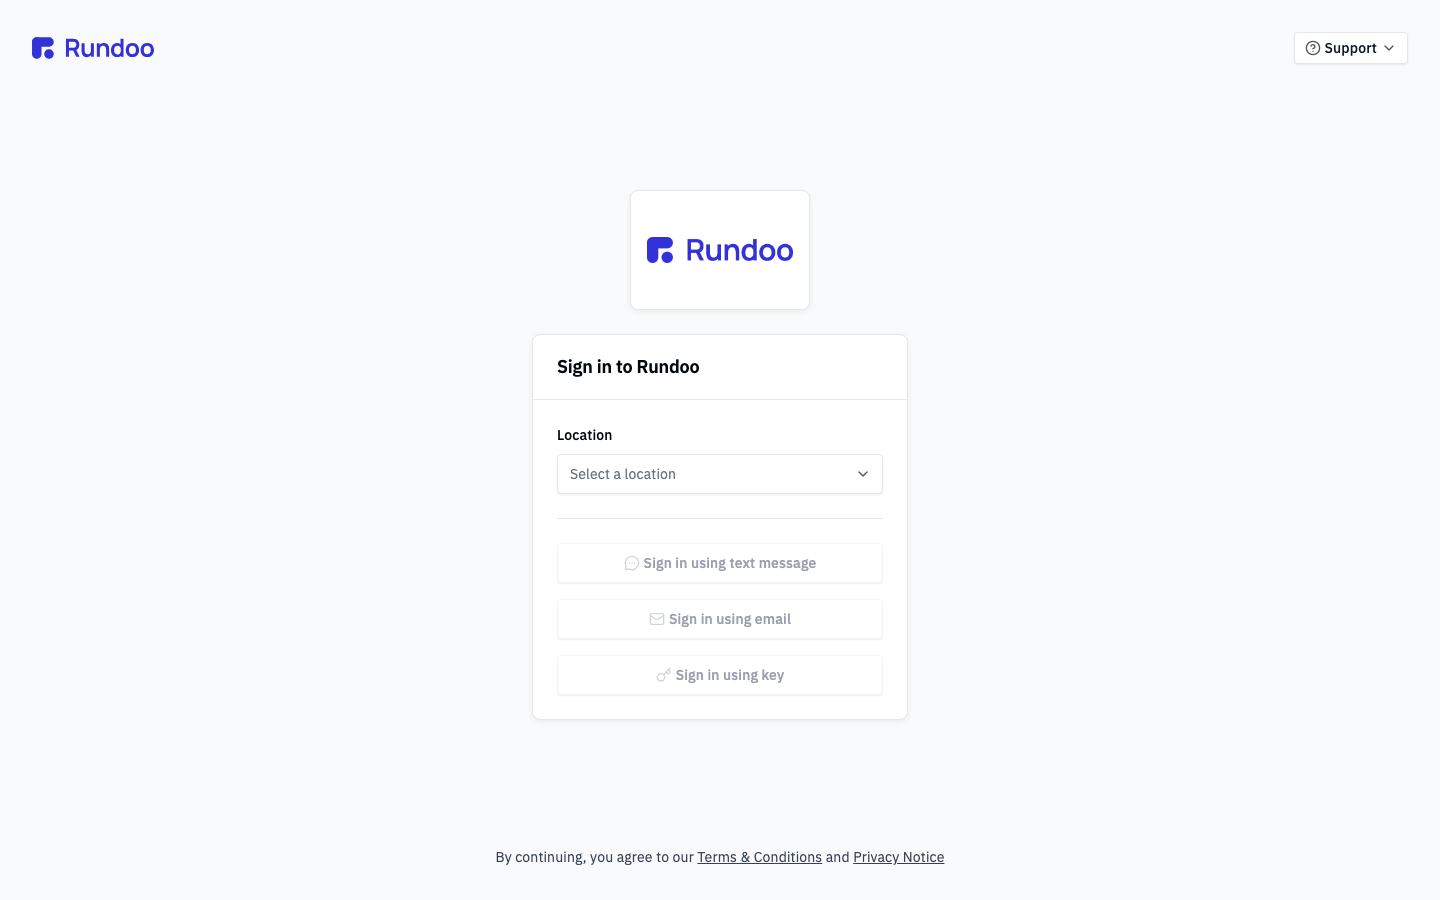
On the sign-in card, pick your Location from the combobox at the top. Nothing else unlocks until you do. Your main location already exists; any additional locations are set up for you by your implementation contact.
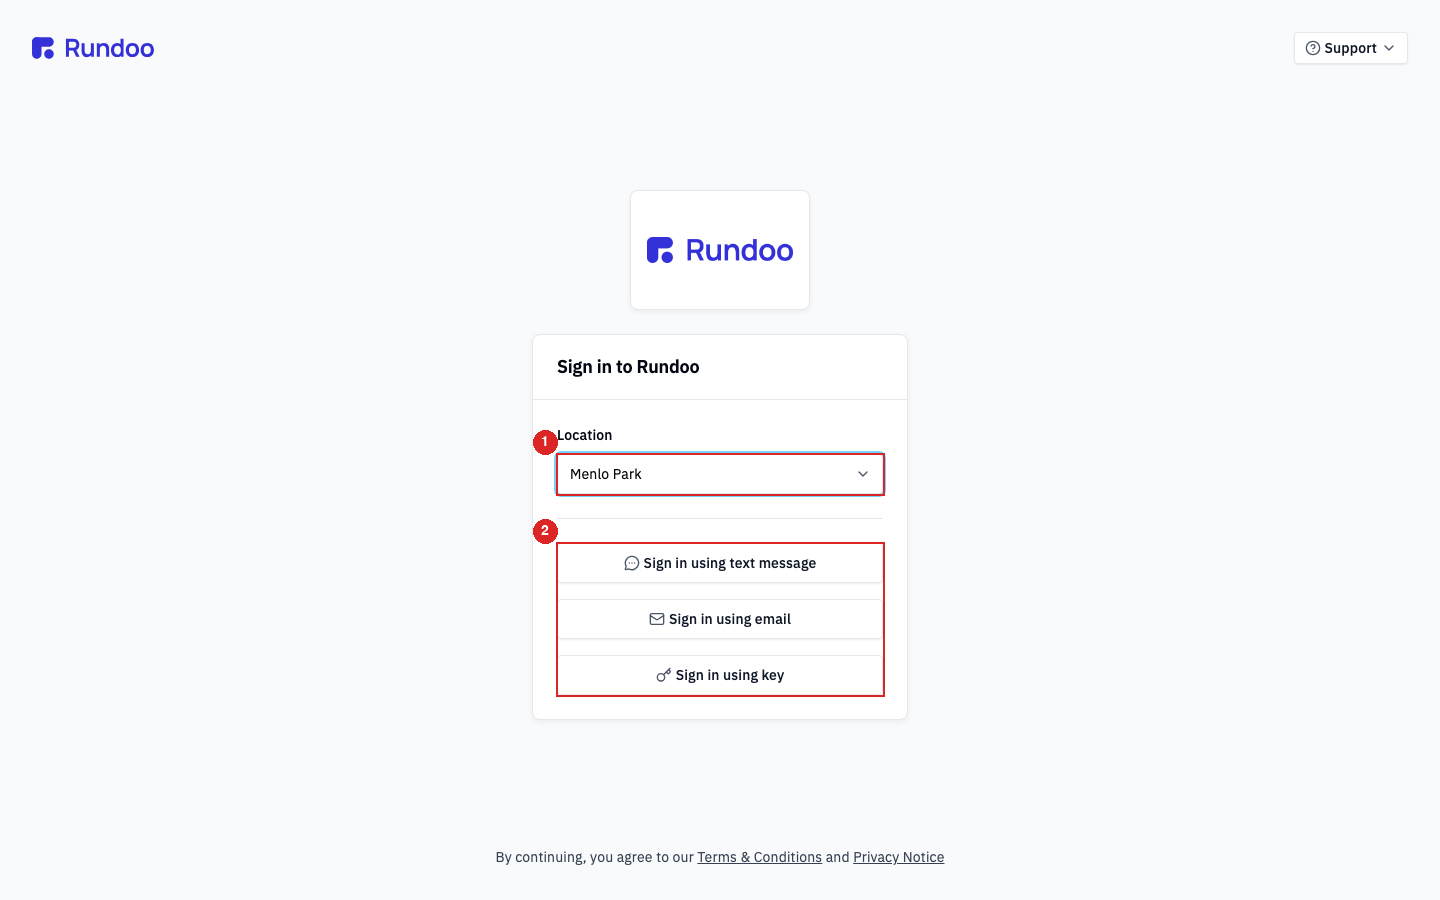
Once a location is picked, three sign-in paths appear:
-
Sign in using text message. Rundoo texts a 6-digit code to the cell phone on your Staff record.
-
Sign in using email. Rundoo emails a 6-digit code from
login@stytch.com(the code expires in 2 minutes). -
Sign in using key. Hold a registered YubiKey or NFC key to the reader. Needs hardware; covered in Stage 3.
For your first sign-in, pick text message or email (your hardware isn't set up yet). Every path lands you in POS mode with your store's data.
See Sign-in for the full walk of each path and the most common gotchas.
Once you're in, take a minute with Welcome to Rundoo and Navigation. They cover the shape of the product (POS vs. Admin), where the sidebars live, and how to jump anywhere with the header Search overlay.
Step 2: Say hi to Support
Support is one click away from every screen in Rundoo. Click Support in the top-right header. The dropdown has three options:
-
Explore the Rundocs (opens this wiki).
-
Chat with support. Opens the in-product chat, staffed by our Support team.
-
Call support (650) 334-3205 (phone line).
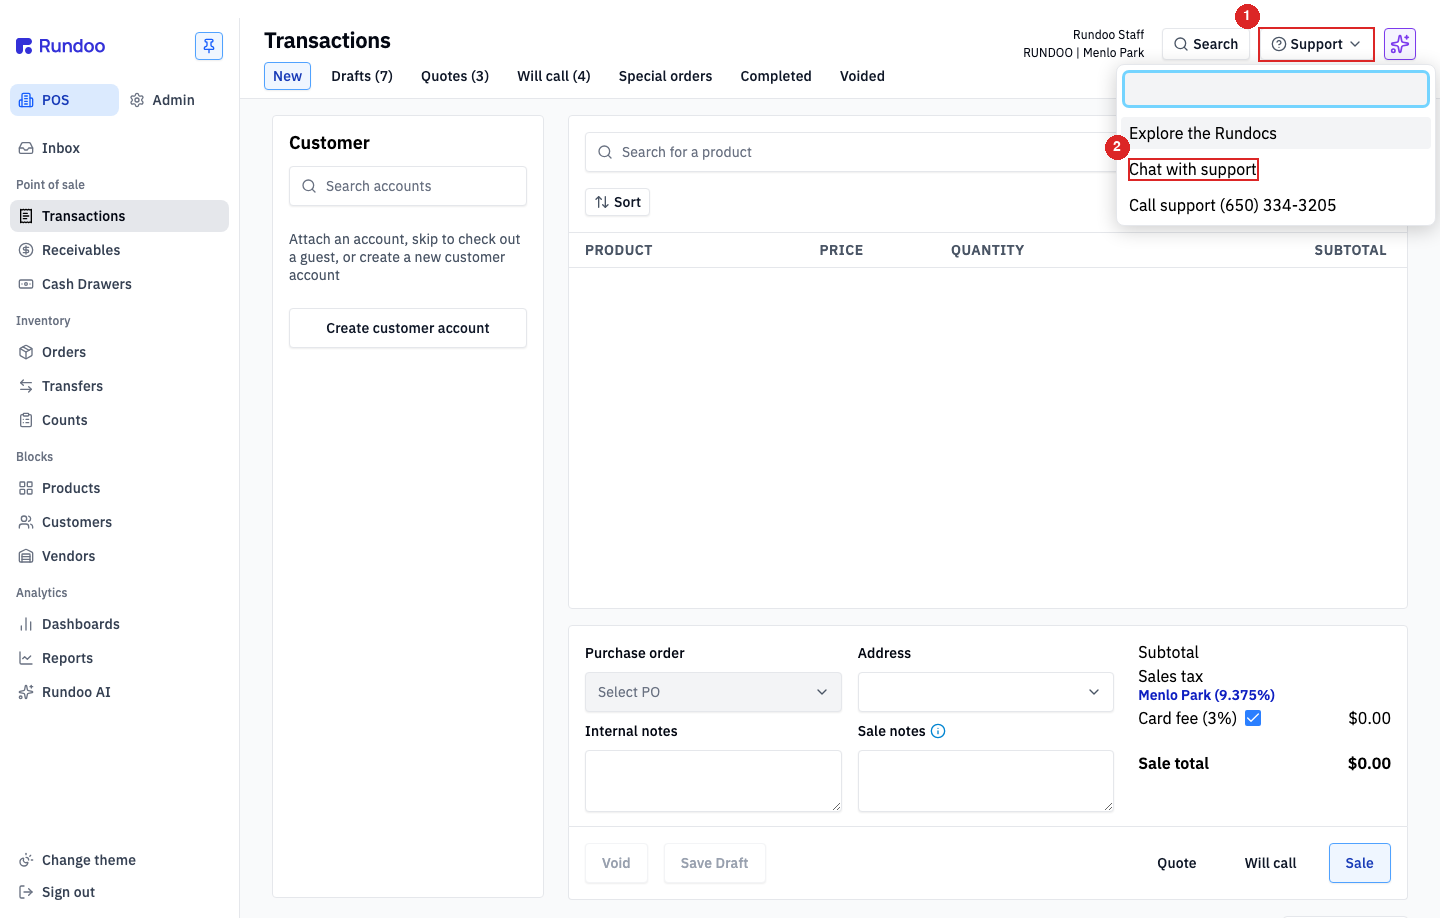
Pick Chat with support and send us a quick "Hi, just working through the Go-live guide." That puts you on our radar so when a real question comes up, you already know the shape of the conversation and we know who you are.
For the full breakdown of what Support can do and when to reach out, see Rundoo Support.
Step 3: Confirm Stripe is connected
Stripe is Rundoo's processor for card and ACH. Every card sale at POS and every ACH receivables payment settles through it. You start Stripe setup yourself from Admin > Finances: click Get set up with Stripe to open Stripe's hosted onboarding, and walk through the ~10–15 minutes of business details Stripe needs to approve your account (the owner's SSN, the store's EIN, prior-year sales). Your Rundoo implementation contact helps with the last step: connecting your external bank account once Stripe's KYC clears.
Flip to Admin mode at the top of the left sidebar, then scroll the sidebar down to Stripe under Accounting.
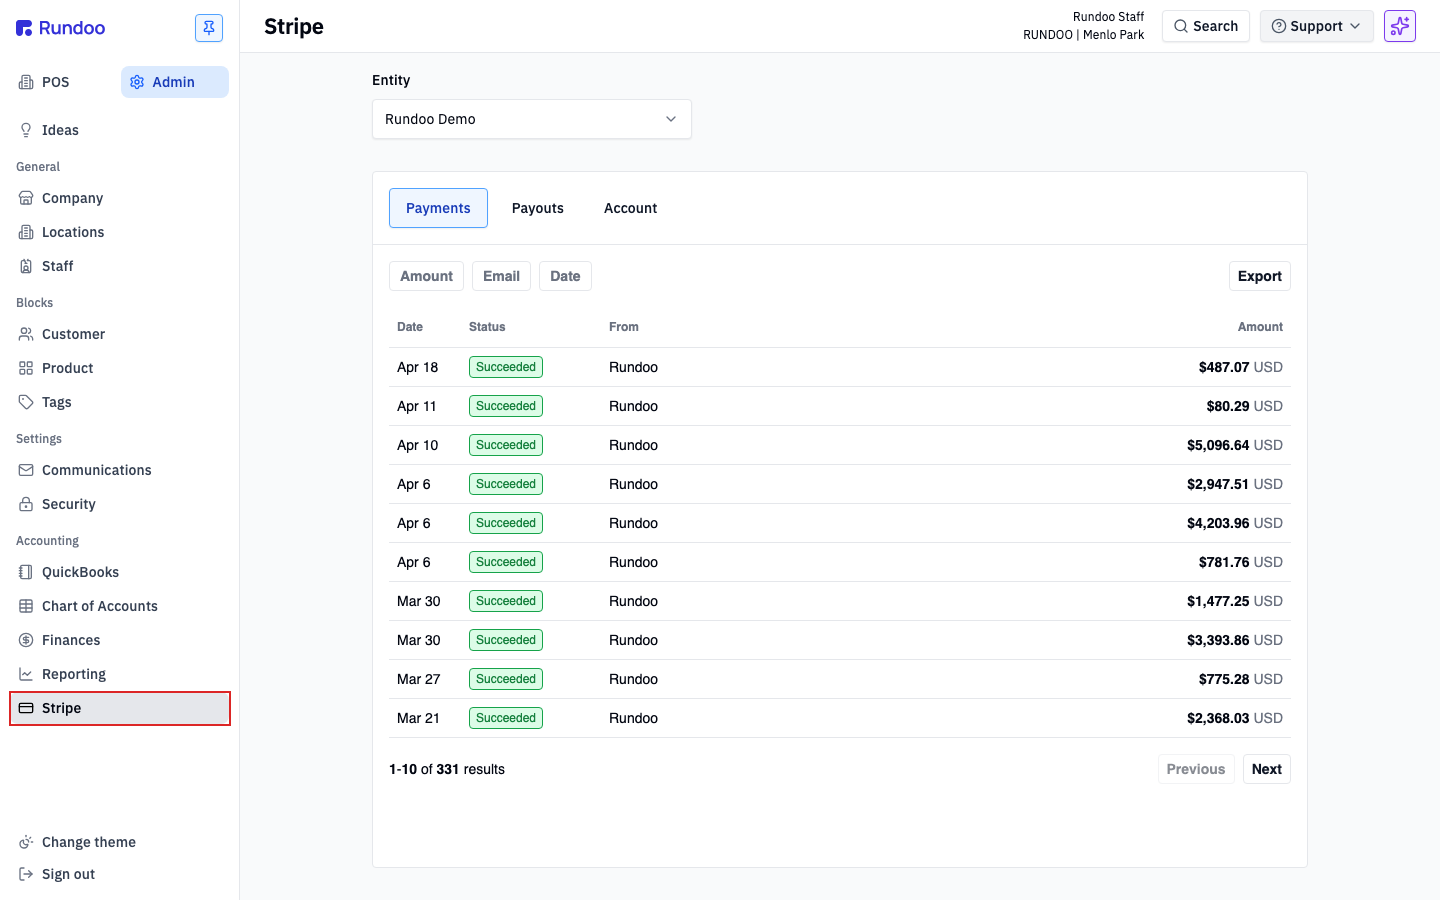
If Stripe is live on your company, the page loads with three top tabs (Payments, Payouts, and Account) and today's card activity already in the Payments ledger. If the page looks empty or prompts you to finish setup, tell your implementation contact. Connecting Stripe is something we complete together.
For bank-account changes after go-live, email support@rundoo.ai. Our team triggers the Stripe re-verification and makes the update for you.
See Stripe for what each of the three tabs does day-to-day.
Step 4: Add your staff
Every person who logs in to Rundoo is a Staff record (cashiers, managers, admins, anyone who'll spend time at the counter). Add them before go-live so they can sign in, ring sales, and carry the permissions you want them to have.
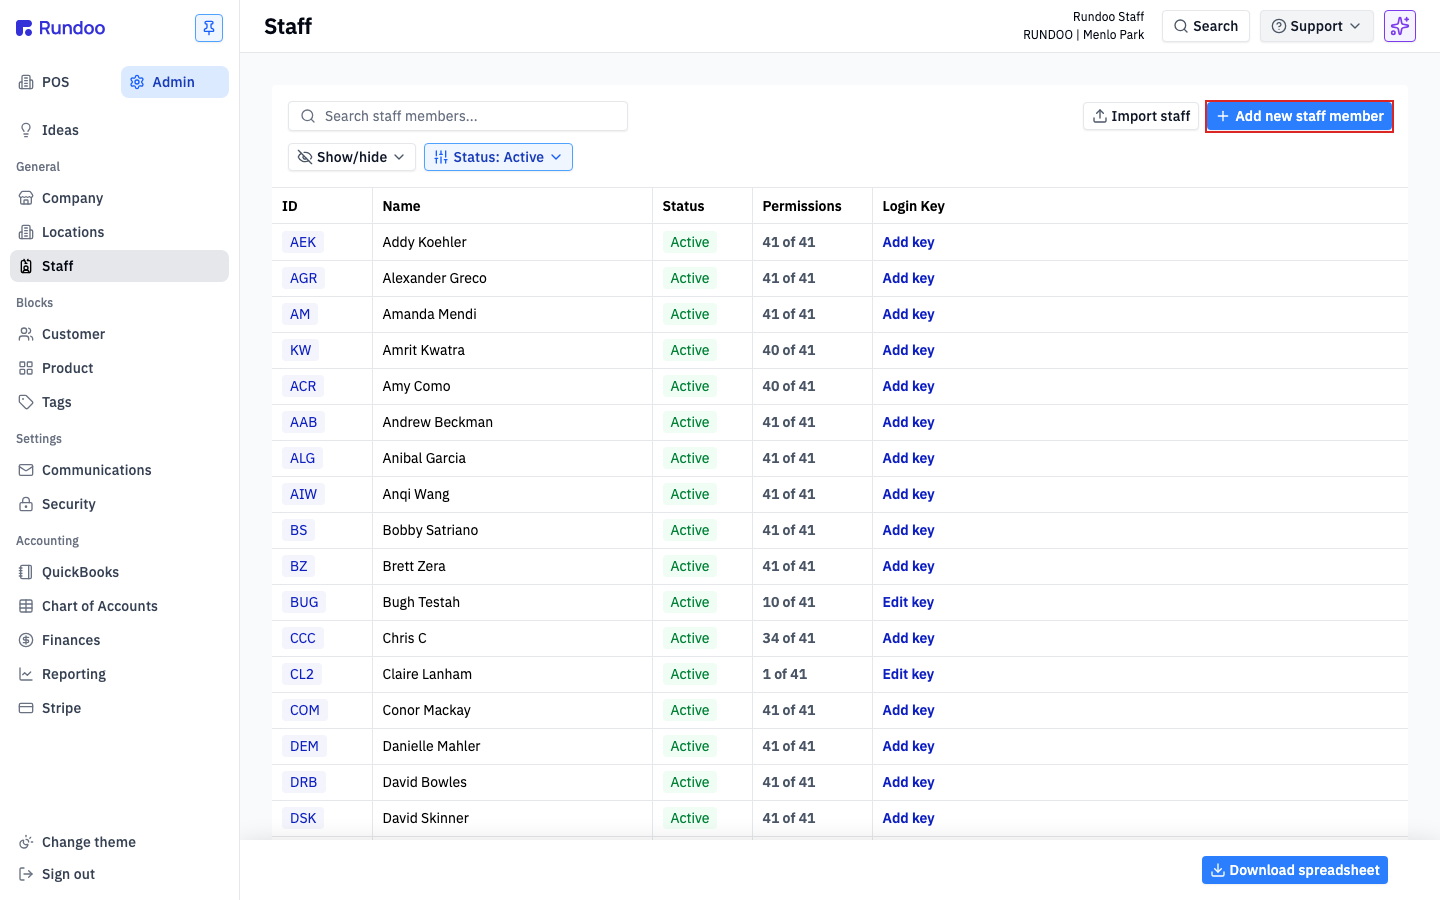
In the Admin > Staff tab, click Add new staff member in the top-right action cluster.
Fill in First name, Last name, Staff ID (usually their initials, this is the short string they'll type at sign-in), Email, and Cell phone. PIN and Address are optional. Click Next to advance to the key-setup screen (Skip this step for now).
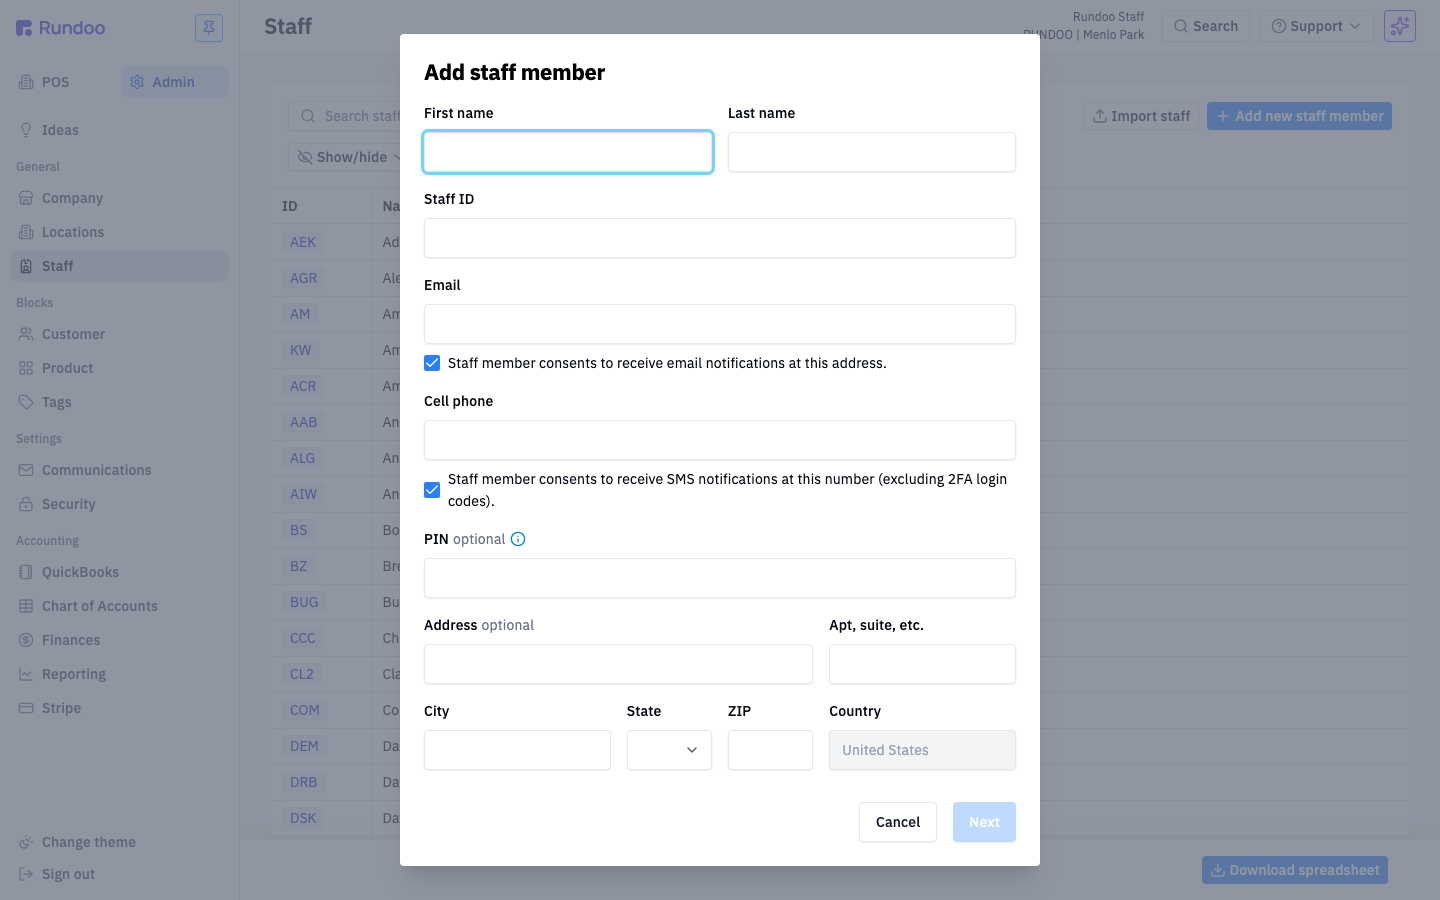
Skip Set up key for now. Login keys (YubiKey / NFC) need the physical hardware at the counter, so you'll wire those up in Stage 3 once the shipment arrives. Staff can sign in via text message or email in the meantime.
After saving, click into the row to fine-tune permissions. There are 41 possible actions grouped by area (Admin, Blocks, Sales, Inventory, Orders, Reporting). A sensible starting split is admins get everything checked, managers get most Sales/Inventory/Orders plus Reporting, cashiers get just enough Sales to ring a customer.
For the full walkthrough, permissions, login keys, deactivating staff who move on, see Staff.
Step 5: Download the mobile apps
Rundoo has two mobile apps:
-
Rundoo POS, for your staff. Check analytics, search products and customers, leave customer notes, count inventory with your phone's camera, and look up past transactions. It's a companion to the web app. You won't ring up sales in it today; use the web app for that. Sign in with the same Staff ID + location + code flow as the web app.
-
Rundoo Customer App. For your customers. They check their balance, view history, pay down invoices, and set up autopay without calling you.
Install the POS app on every staff phone now; hand the Customer App to a few top-tier customers as soon as you go live.
See Mobile apps for app-store links, what each app can and can't do, and how the sign-in flow differs on mobile.
Stage 2: Confirm your data (40 min)
Brand-new dealer with no prior POS? Stage 2 assumes Rundoo is pulling your data from an existing system. If this is your first POS and there's no migration, the flow is shorter: pre-go-live, send Rundoo your vendor pricing sheet, for Benjamin Moore dealers this is the sheet you can download from your BM Web portal, and we'll transfer the products in, create Pricing tiers, and create Finance terms for you. Post-go-live, upload anything off the price sheet, vendors, customers, additional products, via Customer imports, Product imports, and Vendor imports. Rundoo Support can run these imports for you. There's no historical data to pull, no sales history, no accounting data, Rundoo starts fresh from your go-live date.
Before go-live, Rundoo pulls the core of your store from your old POS into Rundoo: Products, Customers, Vendors, historical Sales, and, for paint stores, your mixed-color tint formulas. The night before go-live, after your store closes, we do one final sync for product inventory counts and customer balances as of end-of-day. For the full reference on what transfers (including how paint color formulas and Benjamin Moore ColorX numbers come across), see Data migration.
This stage is about spot-checking that data before go-live, so our team can correct anything while there's still time. The goal isn't to audit every record; it's to skim your top products, customers, and vendors, plus a handful of recent sales, and flag anything that looks wrong.
How Rundoo gets your data. To pull from your old POS, Rundoo sets up a one-time remote connection to the computer it runs on (our Data team connects unattended, reads the data out, and lands it in Rundoo). Your implementation contact walks you through the 5-minute install. Nothing is modified in your old system; it's read-only access.
Step 6: Confirm Products
In the POS > Products tab, open a few individual products, at least one from each major category you sell (paint, sundries, hardware, etc.). Each product's detail page has six top tabs: History, Inventory, Pricing, Costs, Catalog, Settings.
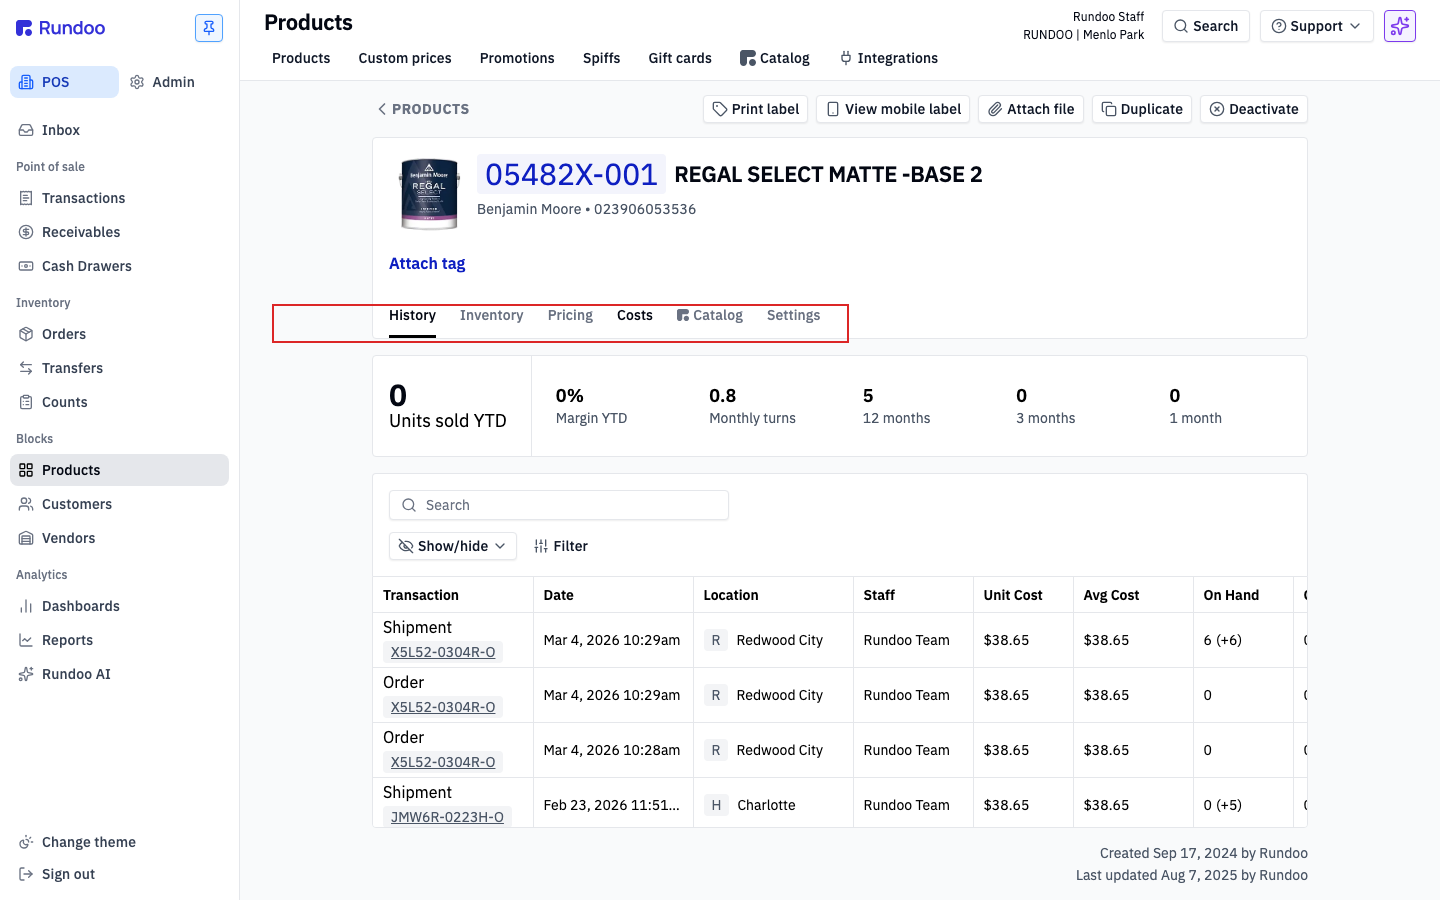
For each product, check:
-
Pricing. Prices and costs look right? Priced by dollar or margin, matching what you expect? The right Pricing tiers (Tier 1 MsrpthroughTier 11 Volume contractor) populated? -
Costs. Does the standard or average cost match your last vendor invoice? -
Inventory(bin locations and on-hand counts look right per location)? -
History. Recent transactions on this product match what you remember selling? -
Catalog(for Benjamin Moore products), is theBbadge showing? Is the product tintable if it should be? -
Settings, descriptions correct? Any Eco fees / disposal fees attached? UPCs accurate?
If anything looks off, message your implementation contact with the product's SKU (top of the detail page) and what's wrong. Don't try to fix it in bulk yourself before go-live. We correct it on Rundoo's side so the fix survives the final sync.
See Products for the full walkthrough of the product detail page.
Step 7: Confirm Customers
In the POS > Customers tab, sort by Sales YTD high-to-low and open your top 5–10 customers. Each detail page has six top tabs: Transactions, Balance, Jobs, Relationship, Custom Prices, Settings.
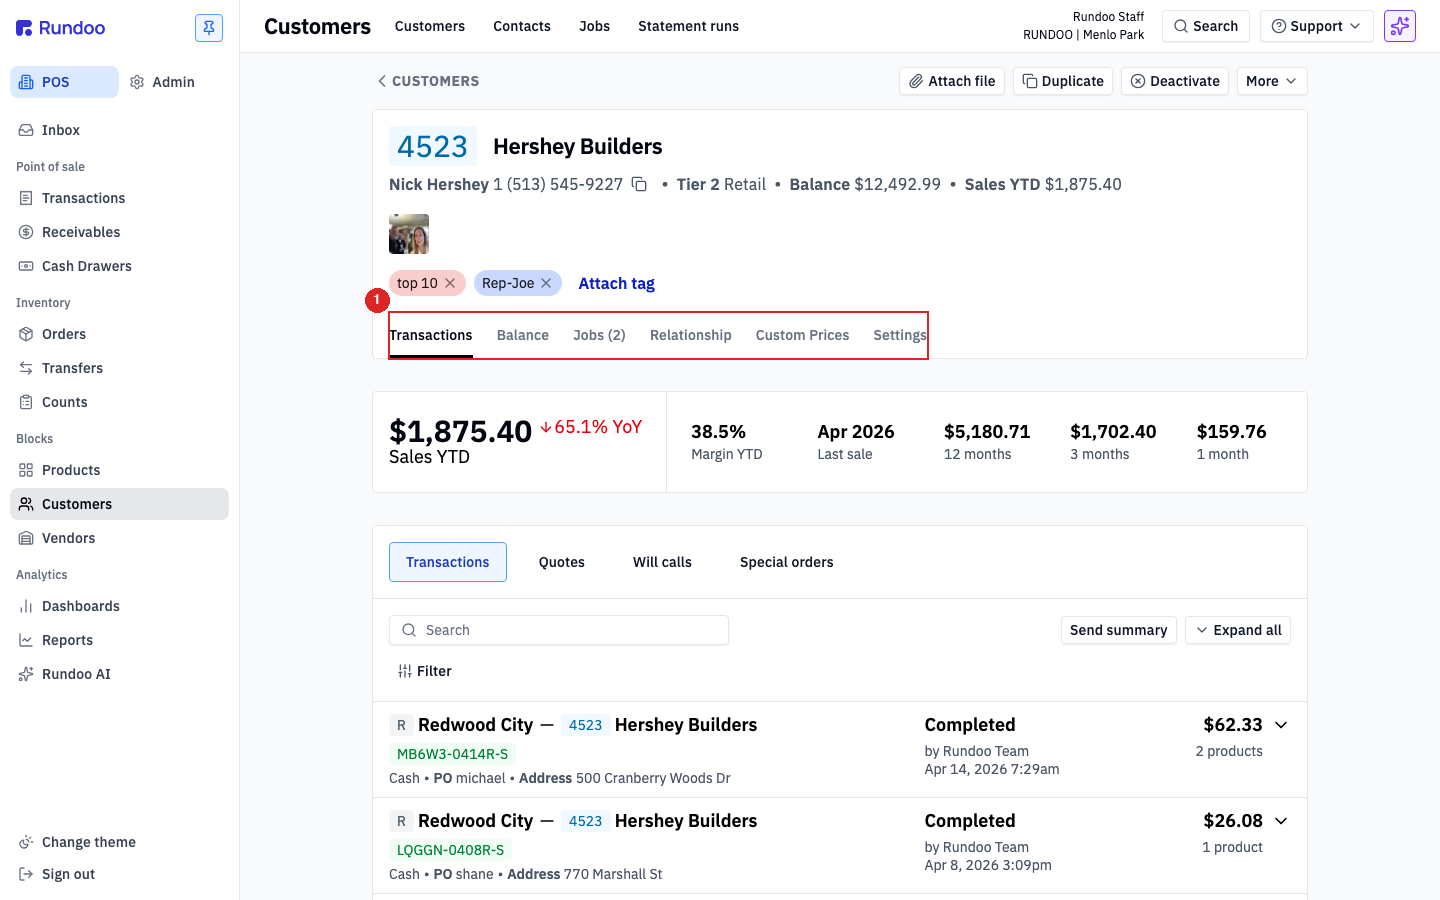
For each, check:
-
Transactions. Recent sales history match what you'd expect? -
Balance(outstanding balance right)? For charge-account customers, does the finance term match what you have in writing (Net 30,Net 30 Statement,5/18 Net 30 EOM, etc.)? -
Jobs, active jobs came across? Job-level notes and addresses? -
Custom Prices. If this customer has custom pricing (per-customer or per-job overrides), is every line populated correctly? -
Relationship(pricing tier) (Tier 1 MsrpthroughTier 11 Volume contractor) set correctly? -
Settings(contacts, addresses, email, and phone right?)
For anything off, flag it to your implementation contact with the customer's ID (the number below their name on the detail page).
See Customers for the detail on how each tab works.
Step 8: Confirm Vendors
In the POS > Vendors tab, open your top 5 vendors.
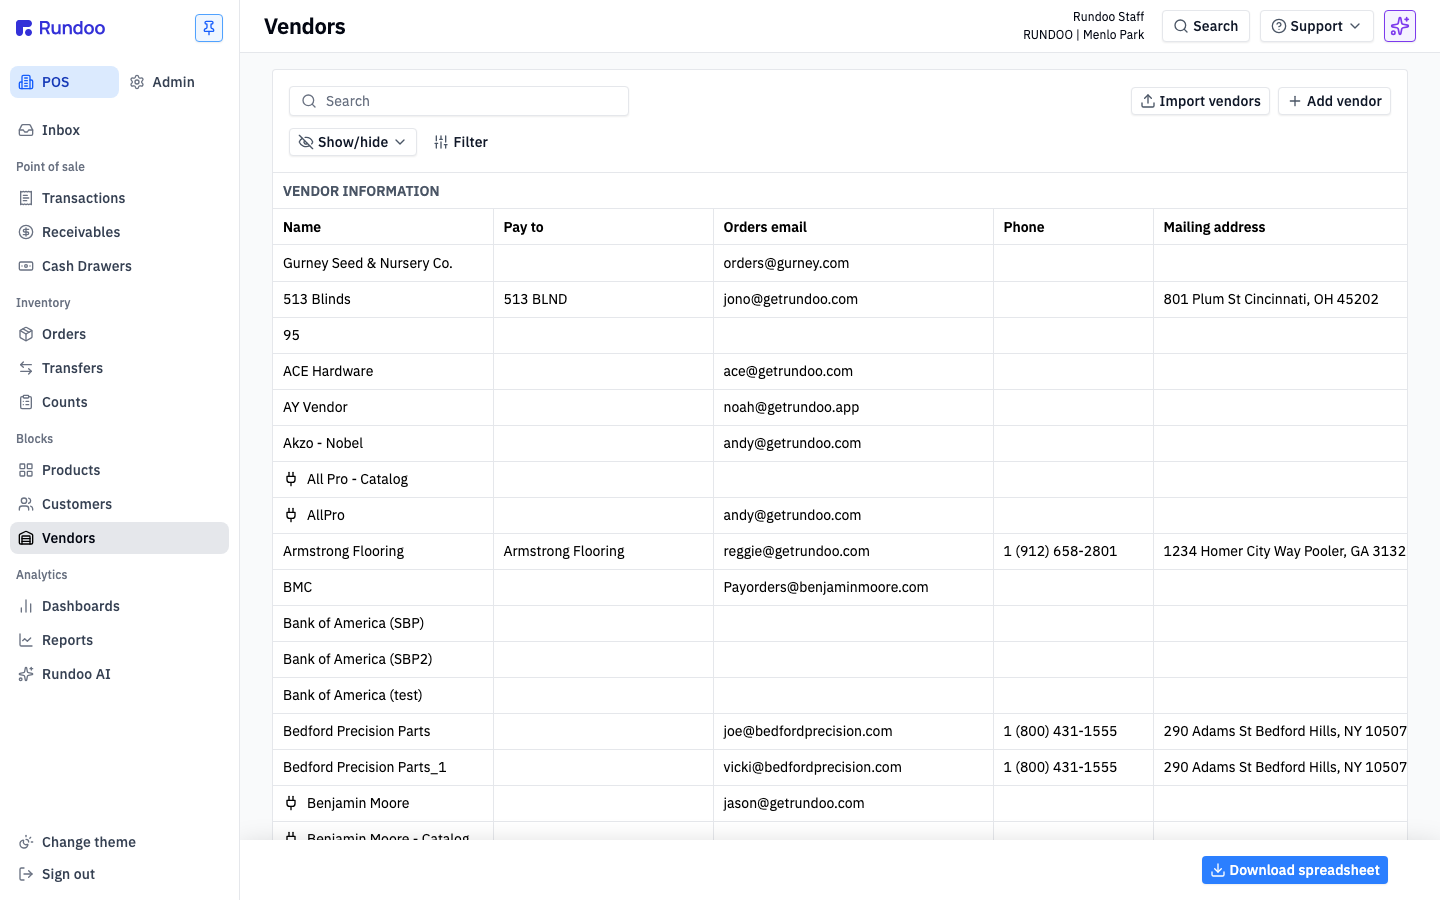
For each, check:
-
Contacts. Email, phone, and name of your rep.
-
Payment details (terms, and the address where you mail checks).
-
Orders email (where Rundoo emails the PO when you submit an
Order).
Same pattern as before. Flag anything wrong to your implementation contact.
See Vendors for everything a vendor record does.
Step 9: Confirm historical sales
In the POS > Transactions > Completed tab, open a handful of recent sales.
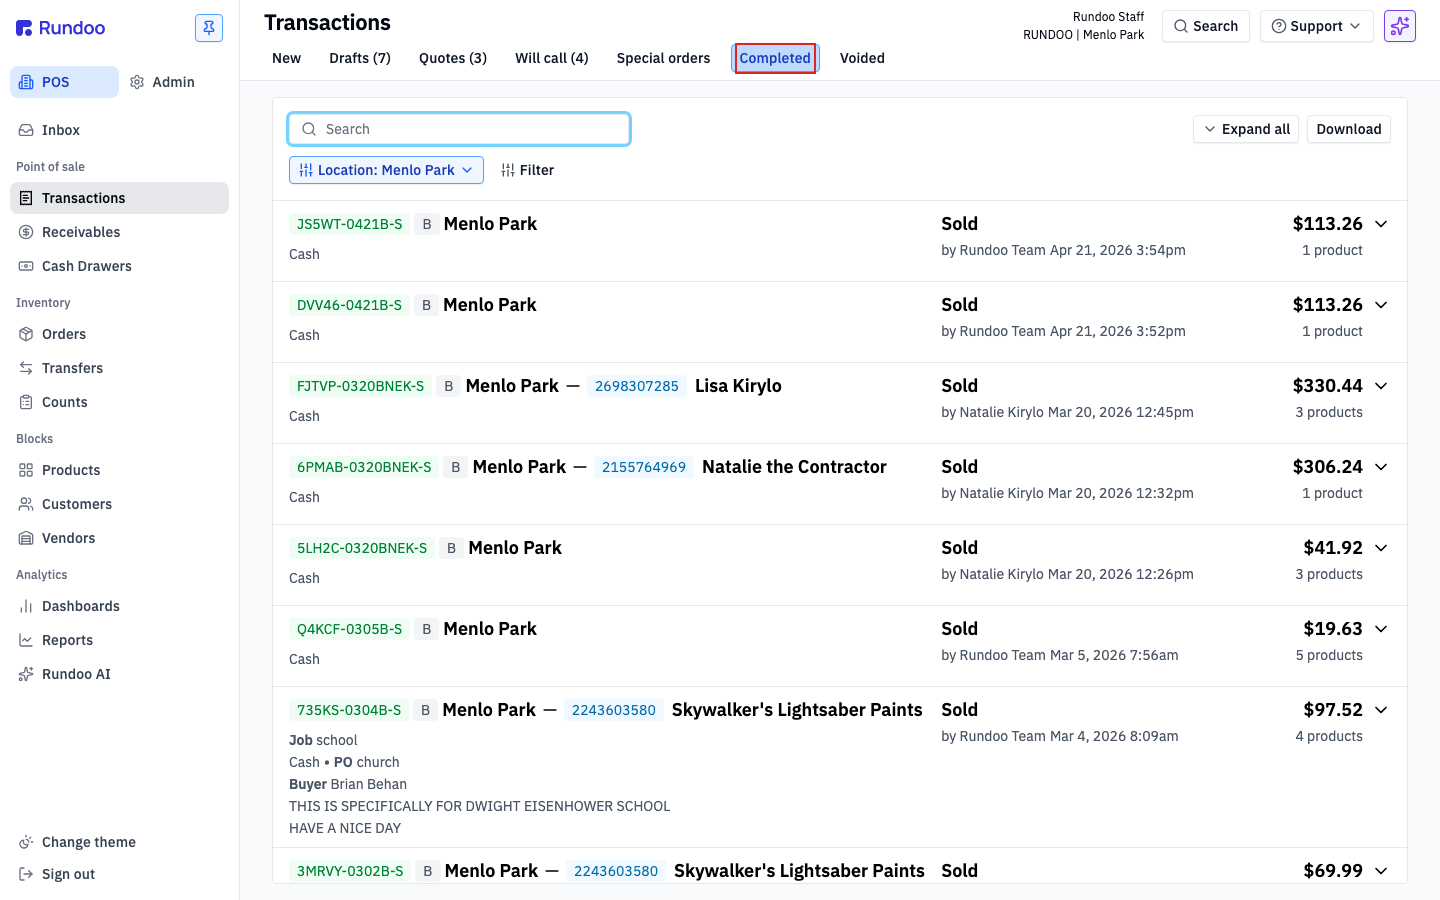
For each, check:
-
Totals (subtotal, sales tax, and
Sale total) match the receipt you have on file. -
Purchase order numbers. If the original sale had one, did it make the trip?
-
Sale notes, things like paint color on a tint line, job reference, or a note the cashier wrote.
-
Tender methods (
Card/Cash/Charge accountmatch how the sale was actually paid).
The goal isn't to audit every sale. It's to confirm the shape of the data is right. If five or six random completed sales look correct, the bulk is probably fine.
Stage 3: Configure your hardware (30 min)
This stage covers the physical hardware that lives on your front counter: thermal receipt printers, cash drawers, Stripe card readers, barcode scanners, label printers, and (optionally) NFC readers and YubiKeys for fast staff sign-in.
If you don't have hardware yet, reach out to your Rundoo implementation contact. Hardware typically ships 5–10 business days before go-live so there's time to unbox, plug in, and pair everything before the lights go on.
Step 10: Set up your counter hardware
Your Rundoo implementation contact walks the hardware call with you the day your shipment arrives. Rundoo pairs your Stripe card readers to your connected account and names them (e.g. Front counter, Paint desk), you connect the thermal printer to the cash drawer over RJ-11, and the barcode scanner plugs into USB in HID mode. No drivers, it just types into whatever field is focused.
For everything that plugs into your counter (what's essential vs. optional, which models we recommend, how multiple stations share one cash drawer via their thermal printer, and what to do when a reader goes offline) see Hardware setup.
Once readers are paired, scanners are scanning, and a test receipt has popped the drawer, you're ready for the last mile.
The night before go-live
After your store closes the night before your go-live date, Rundoo's Data team runs the final data sync (last-minute product inventory, customer balances as of end-of-day, and any sales rung up that day). When you unlock the next morning, Rundoo is flipped from Training mode to Active, your old POS drops to read-only, and every sale from that moment forward is the real thing.
The flip to Active is one-way, and there's no separate sandbox afterward. Once you're live, Rundoo doesn't keep a training copy you can reload with your current data, so new-hire practice happens in your live store. See New hire training for the safe-practice rules.
Leave the remote-access computer on overnight. The final sync runs unattended after you close. The computer our Data team connects to (the one we installed the remote-access tool on) needs to stay powered on and plugged in until the next morning.
Your implementation contact stays close for your first week. Expect a call the morning you go live and another a few days in. After that, Rundoo Support handles the day-to-day.
Congratulations, you're live on Rundoo. When something surprises you or an idea hits, post it on the Idea Board. Rundoo ships weekly, and a huge share of what's shipped started as a customer post.