
Rundocs › Admin & Settings
Locations
Last updated 2026-09-11
A location in Rundoo is one of your physical stores, with its own address, phone, sales-tax rate, cash drawer, and inventory. Every transaction happens at a location, so Rundoo always knows which register it was rung on, which inventory moved, and which tax rate applied.
In the Admin mode, open Locations in the left sidebar (that's where all of your stores live, plus the tax rules that govern them).
The Locations page
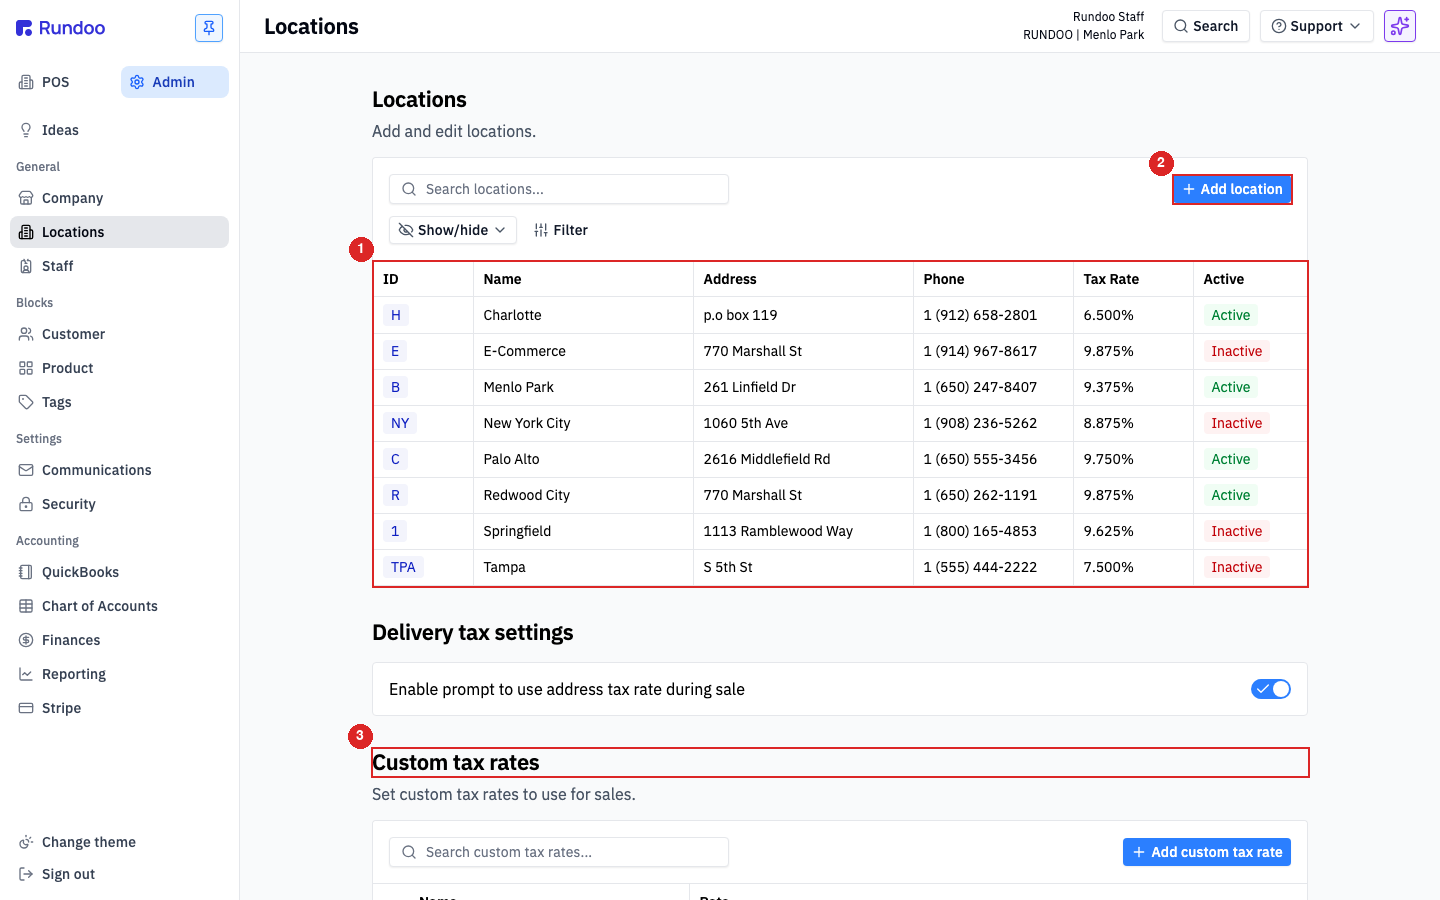
The Locations page holds three stacked sections, top to bottom:
-
Locations (the table of your stores). Each row shows
ID,Name,Address,Phone,Tax Rate, and whether the location isActive. TheStatus: Activefilter above the table hides deactivated stores by default; flip it toAllorInactiveto see the rest. -
Delivery tax settings, a
Delivery tax ratedropdown with three choices:Always use current location's tax rate(the store's rate always wins),Prompt which address tax rate to use during sale(when a delivery address has a different rate, the cashier is asked which to use), andAlways use delivery address tax rate if present(the destination's rate is applied automatically on any sale that carries one). -
Custom tax rates, extra tax rates you can apply manually to a sale or a customer. Covered in Tax.
The Add location button sits at the top-right of the Locations table.
Adding a location
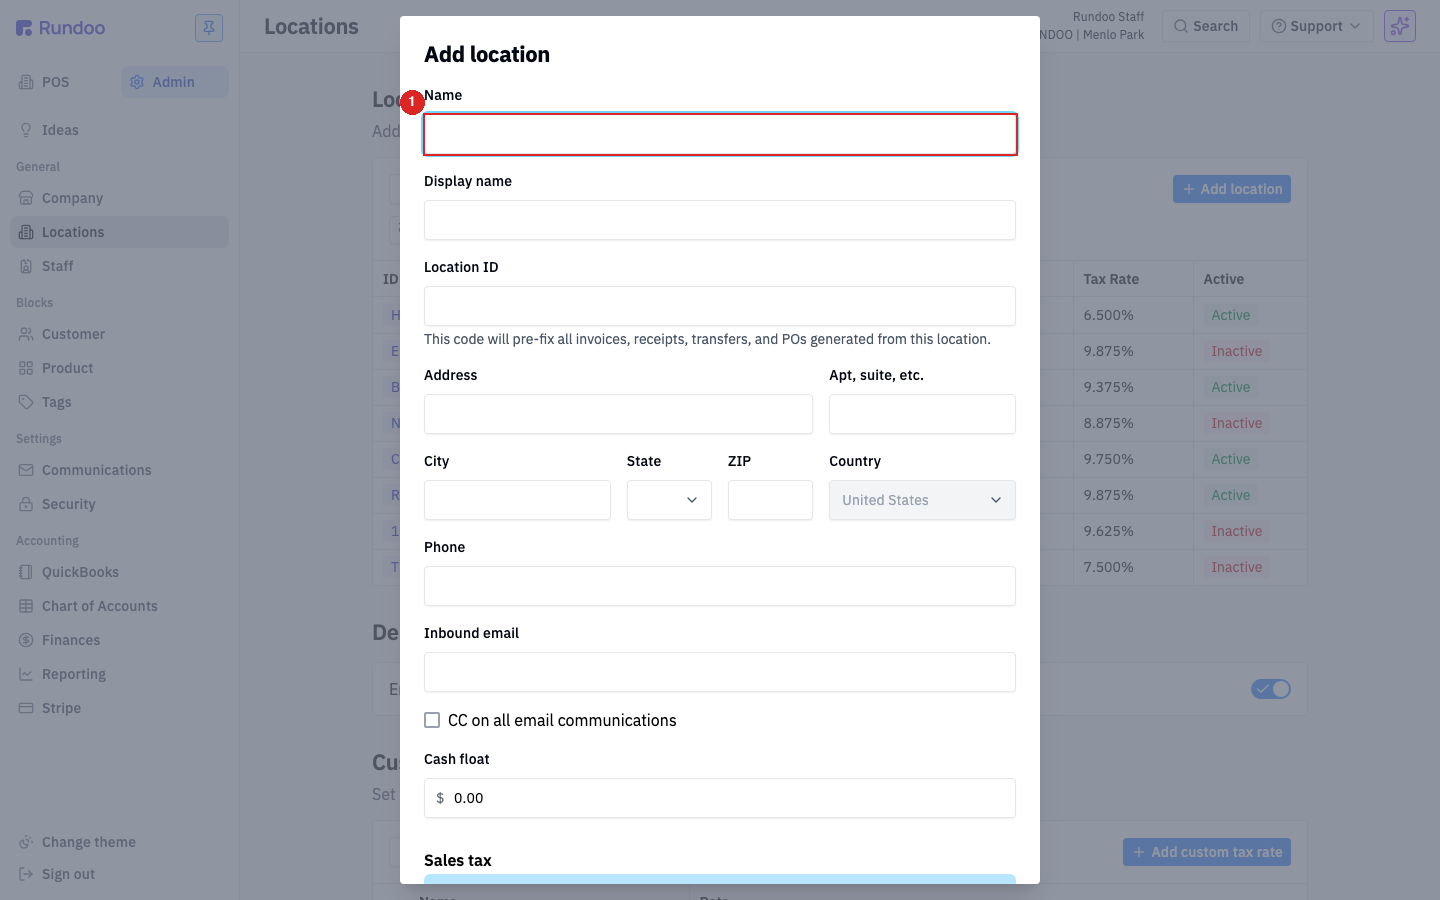
Click Add location to open the form. The required field is Name (that's the in-product label for the store that shows up in filters, headers, and the location switcher at sign-in). Everything else is optional at save time but strongly recommended: missing address means no auto-calculated tax, missing phone means receipts won't carry one.
| Field | What it's for |
|---|---|
| Name | The store's name inside Rundoo. Required. |
| Display name | What prints on receipts, invoices, and statements, if you want that to differ from the internal name (e.g. internal Menlo Park, customer-facing Rundoo Paints). |
| Location ID | A short code (often 1–3 letters) that prefixes every invoice, receipt, transfer, and PO generated at this location (e.g. B-00214 tells you at a glance it came from the Menlo Park store). |
| Address | Street address. This is the address that prints on this store's sale receipts and other printed documents. Typing here opens a Google-style autocomplete dropdown; pick the match to fill City, State, ZIP, and Country in one shot. |
| Apt, suite, etc. | Unit / suite number, if any. |
| Phone | The store's public phone. Shows on receipts and in the locations list. |
| Inbound email | The email address customers can reach this store at. CC on all email communications below it carbon-copies every email Rundoo sends on this store's behalf (sale receipts, statement reminders) to this address. |
| Cash float | The starting cash in this location's register at the top of each day. Drives the close-out reconciliation math in Cash drawer. |
| Sales tax | Auto-generated from the address after you save. You don't type a rate here (Rundoo fetches the correct one from the address). |
| GL accounts | Rundoo auto-picks the highest-numbered GL account of each type for this location. Adjust the mapping in Chart of Accounts if you need something specific. |
Save commits the location. You're dropped back on the Locations list with the new row at the bottom.
The Address field is a Google-powered autocomplete. Start typing and it offers matching addresses. Pick one to populate City / State / ZIP / Country in a single click. Typing a full address without picking a suggestion is allowed but means the fields below stay empty, and the auto-calculated Sales tax won't resolve.
Editing a location
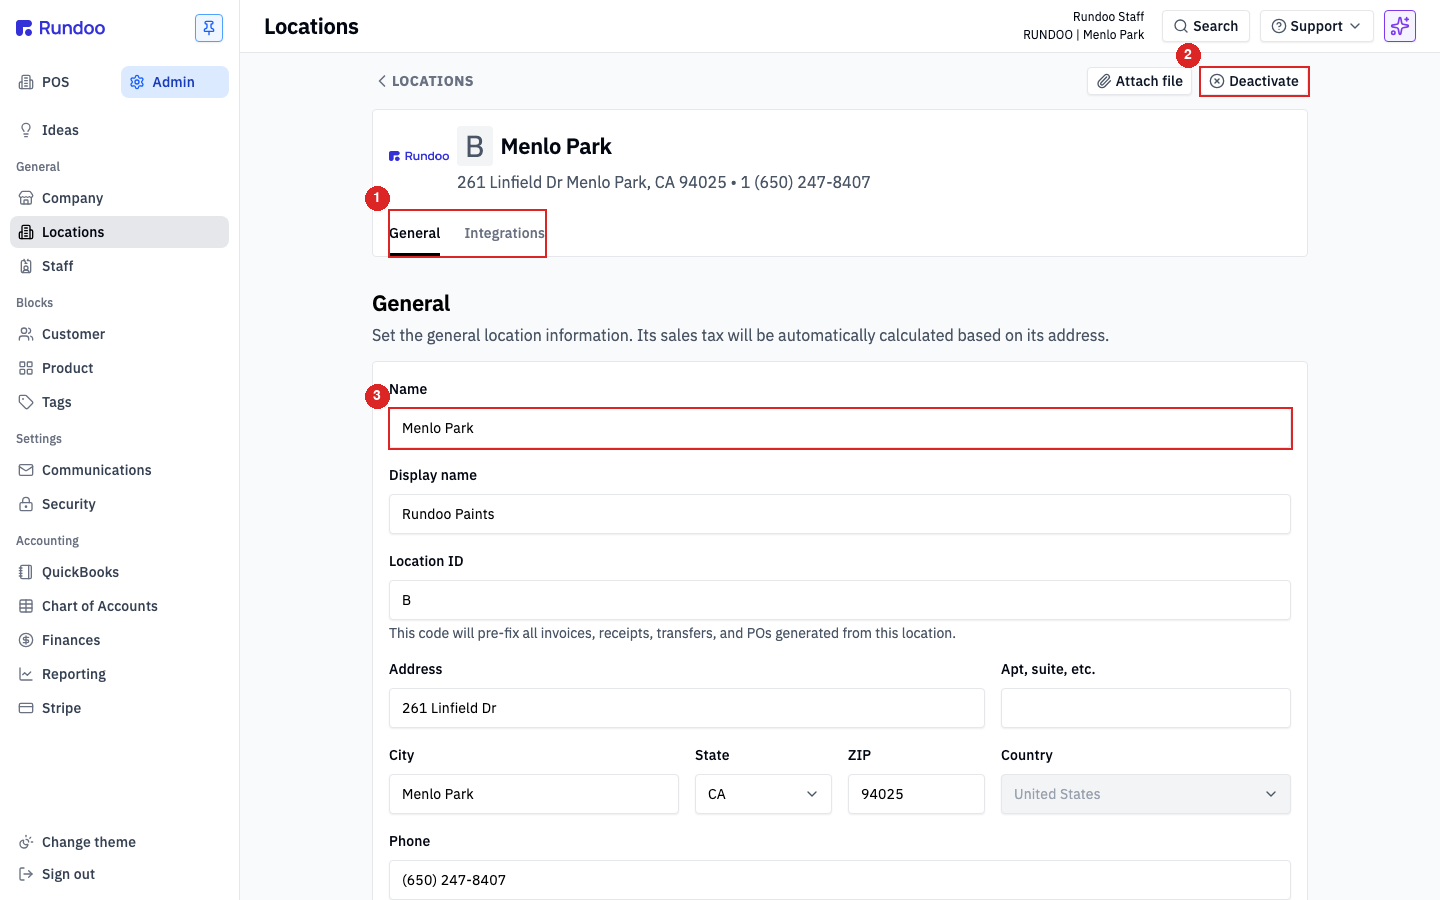
Click any row on the Locations list to open that store's detail page. You land on the General top tab, which mirrors the Add-location form (every field above is editable here). The Integrations top tab holds per-location third-party settings (like a QuickBooks mapping or a Benjamin Moore store code) for Rundoo tenants that have them configured.
Three actions live at the top-right of the page:
-
Attach file, for keeping lease docs, permits, or local-tax registrations on the location record.
-
Deactivate. Hides the store from POS mode's location switcher and from most filters. Deactivation doesn't delete history (past sales, inventory movements, and statements are preserved and stay searchable). Use this when you close a store or retire a pop-up location.
-
« LOCATIONS (top-left). Returns you to the list.
Changes save inline when you move focus off a field (no separate Save button on this page).
Changing Name renames the location everywhere it's referenced (past receipts, reports, filters, headers). Changing Location ID only affects new documents generated after the change; existing invoice numbers keep their old prefix.
The location indicator in the header
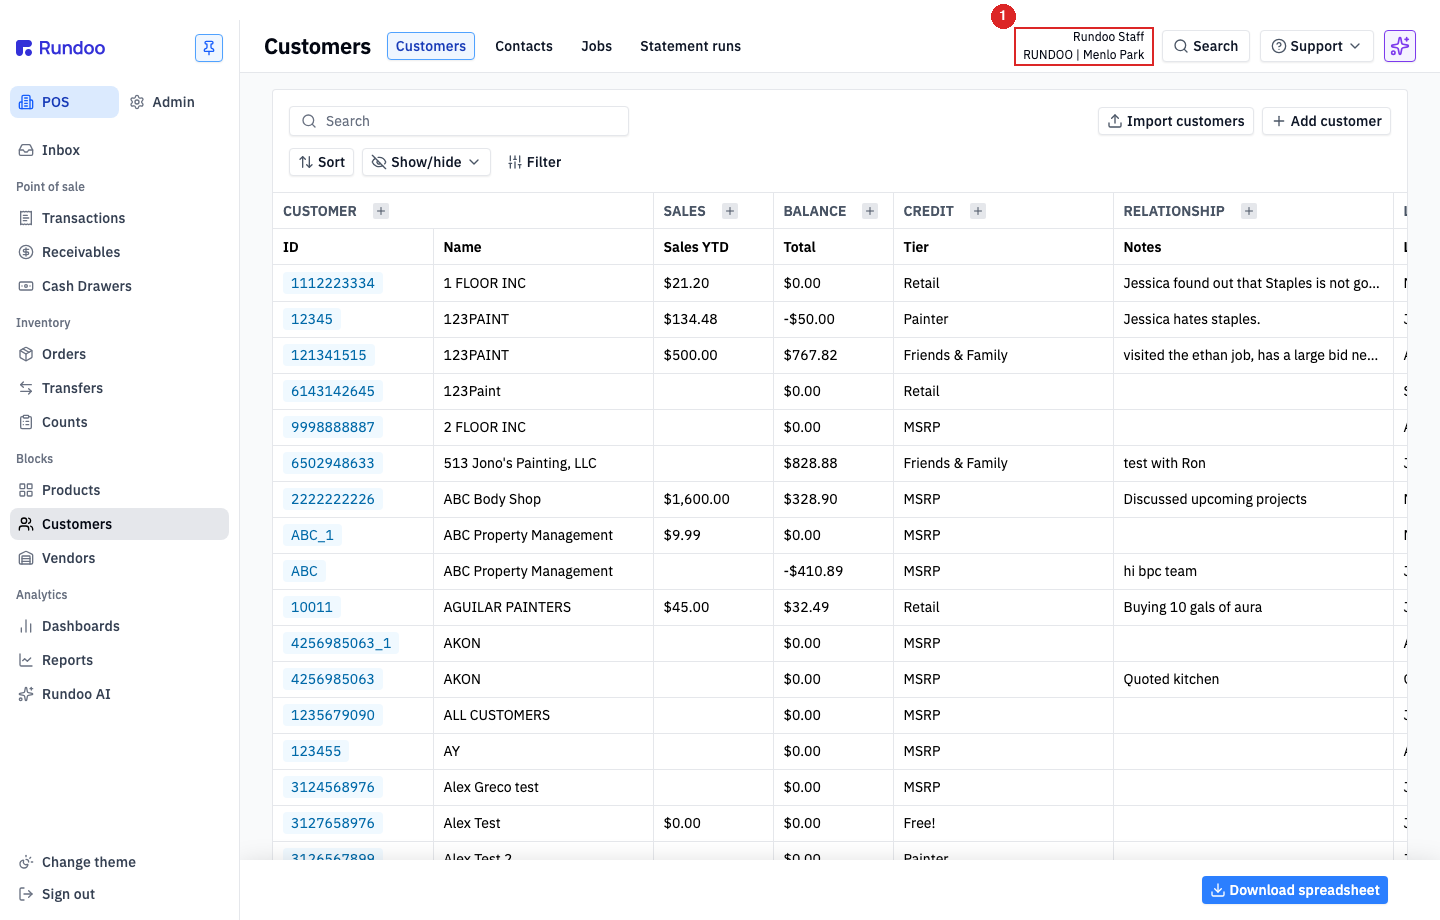
Top-right of every authenticated page, Rundoo shows who you are and where you're signed in (two stacked lines: your staff name over RUNDOO | {Location}). It tells you which register, which inventory, and which tax rate this session is acting on, and it's also how you switch stores.
To switch locations, click the indicator and choose Change location. That opens a picker listing your active locations; pick one and Rundoo switches your session to that store in place, no sign-out and sign-in required. See Navigation for the full header anatomy.
Staff permissions are location-scoped. A clerk granted access to one location won't see inventory or sales from another, even after switching. Per-staff, per-location access lives in Staff.
Tax rates per location
Each location's sales-tax rate is auto-resolved from its street address, you don't pick it, Rundoo pulls the correct rate for that ZIP/jurisdiction. Most US locations have a single rate (e.g. 9.375% for Menlo Park) and the Tax Rate column shows just the percentage. Locations in jurisdictions that stack multiple rates, Canadian provinces with federal + provincial sales tax, for example, show every rate in the column as a comma-separated list (GST (5%), PST (7%)), and the location's detail page lists each named rate as its own pill under Sales tax.
Two things override or augment it:
-
Delivery tax settings (the
Delivery tax ratedropdown on the Locations page). Set it to prompt the cashier with the destination address's rate on delivery sales, or to always apply the delivery address's rate, or to always keep the store's own rate (useful when you're a California store delivering into a different county). -
Custom tax rates (section below the toggle). These are named, manually-applied rates you can attach to a specific sale or tie to a customer (
Tax exempt,Resale, state-specific blends). They live per-company, not per-location.
For the full tax model (custom rates, exemptions, delivery prompts, and when each kicks in) see Tax.
Recommended Rundocs
-
Navigation. The header, sidebar, and how to read the location indicator in-app.
-
Tax (custom tax rates, exemptions, and per-delivery overrides).
-
Staff, giving each person the right access at each location.
-
Company details. The company sits above your locations; its Default location setting determines which store new staff land on.