Create a set
New item set → type a name
It becomes the active target right away.

Getting Started with Rundoo · Transactions
Split one sale into named sets, each with its own total.
A contractor walks in buying for two different job sites, but wants it all on one ticket. He still needs to know which materials went to which job so his own billing stays clean. Item Sets handle that right on the sale: you split one order into named groups, each with its own subtotal, and those groups travel with the ticket all the way to the receipt. No sorting a big pile of line items at the end.
An Item Set is just a named group of lines inside one sale, like "Galvin Elementary School" and "Miller Fence." You name a set, and whatever you ring up next drops straight into it. When you switch to a different set, new items land there instead. Anything you sell that belongs to neither job stays ungrouped at the top of the cart. Set the groups once as you go, and Rundoo keeps them organized from the first scan to the printed receipt.
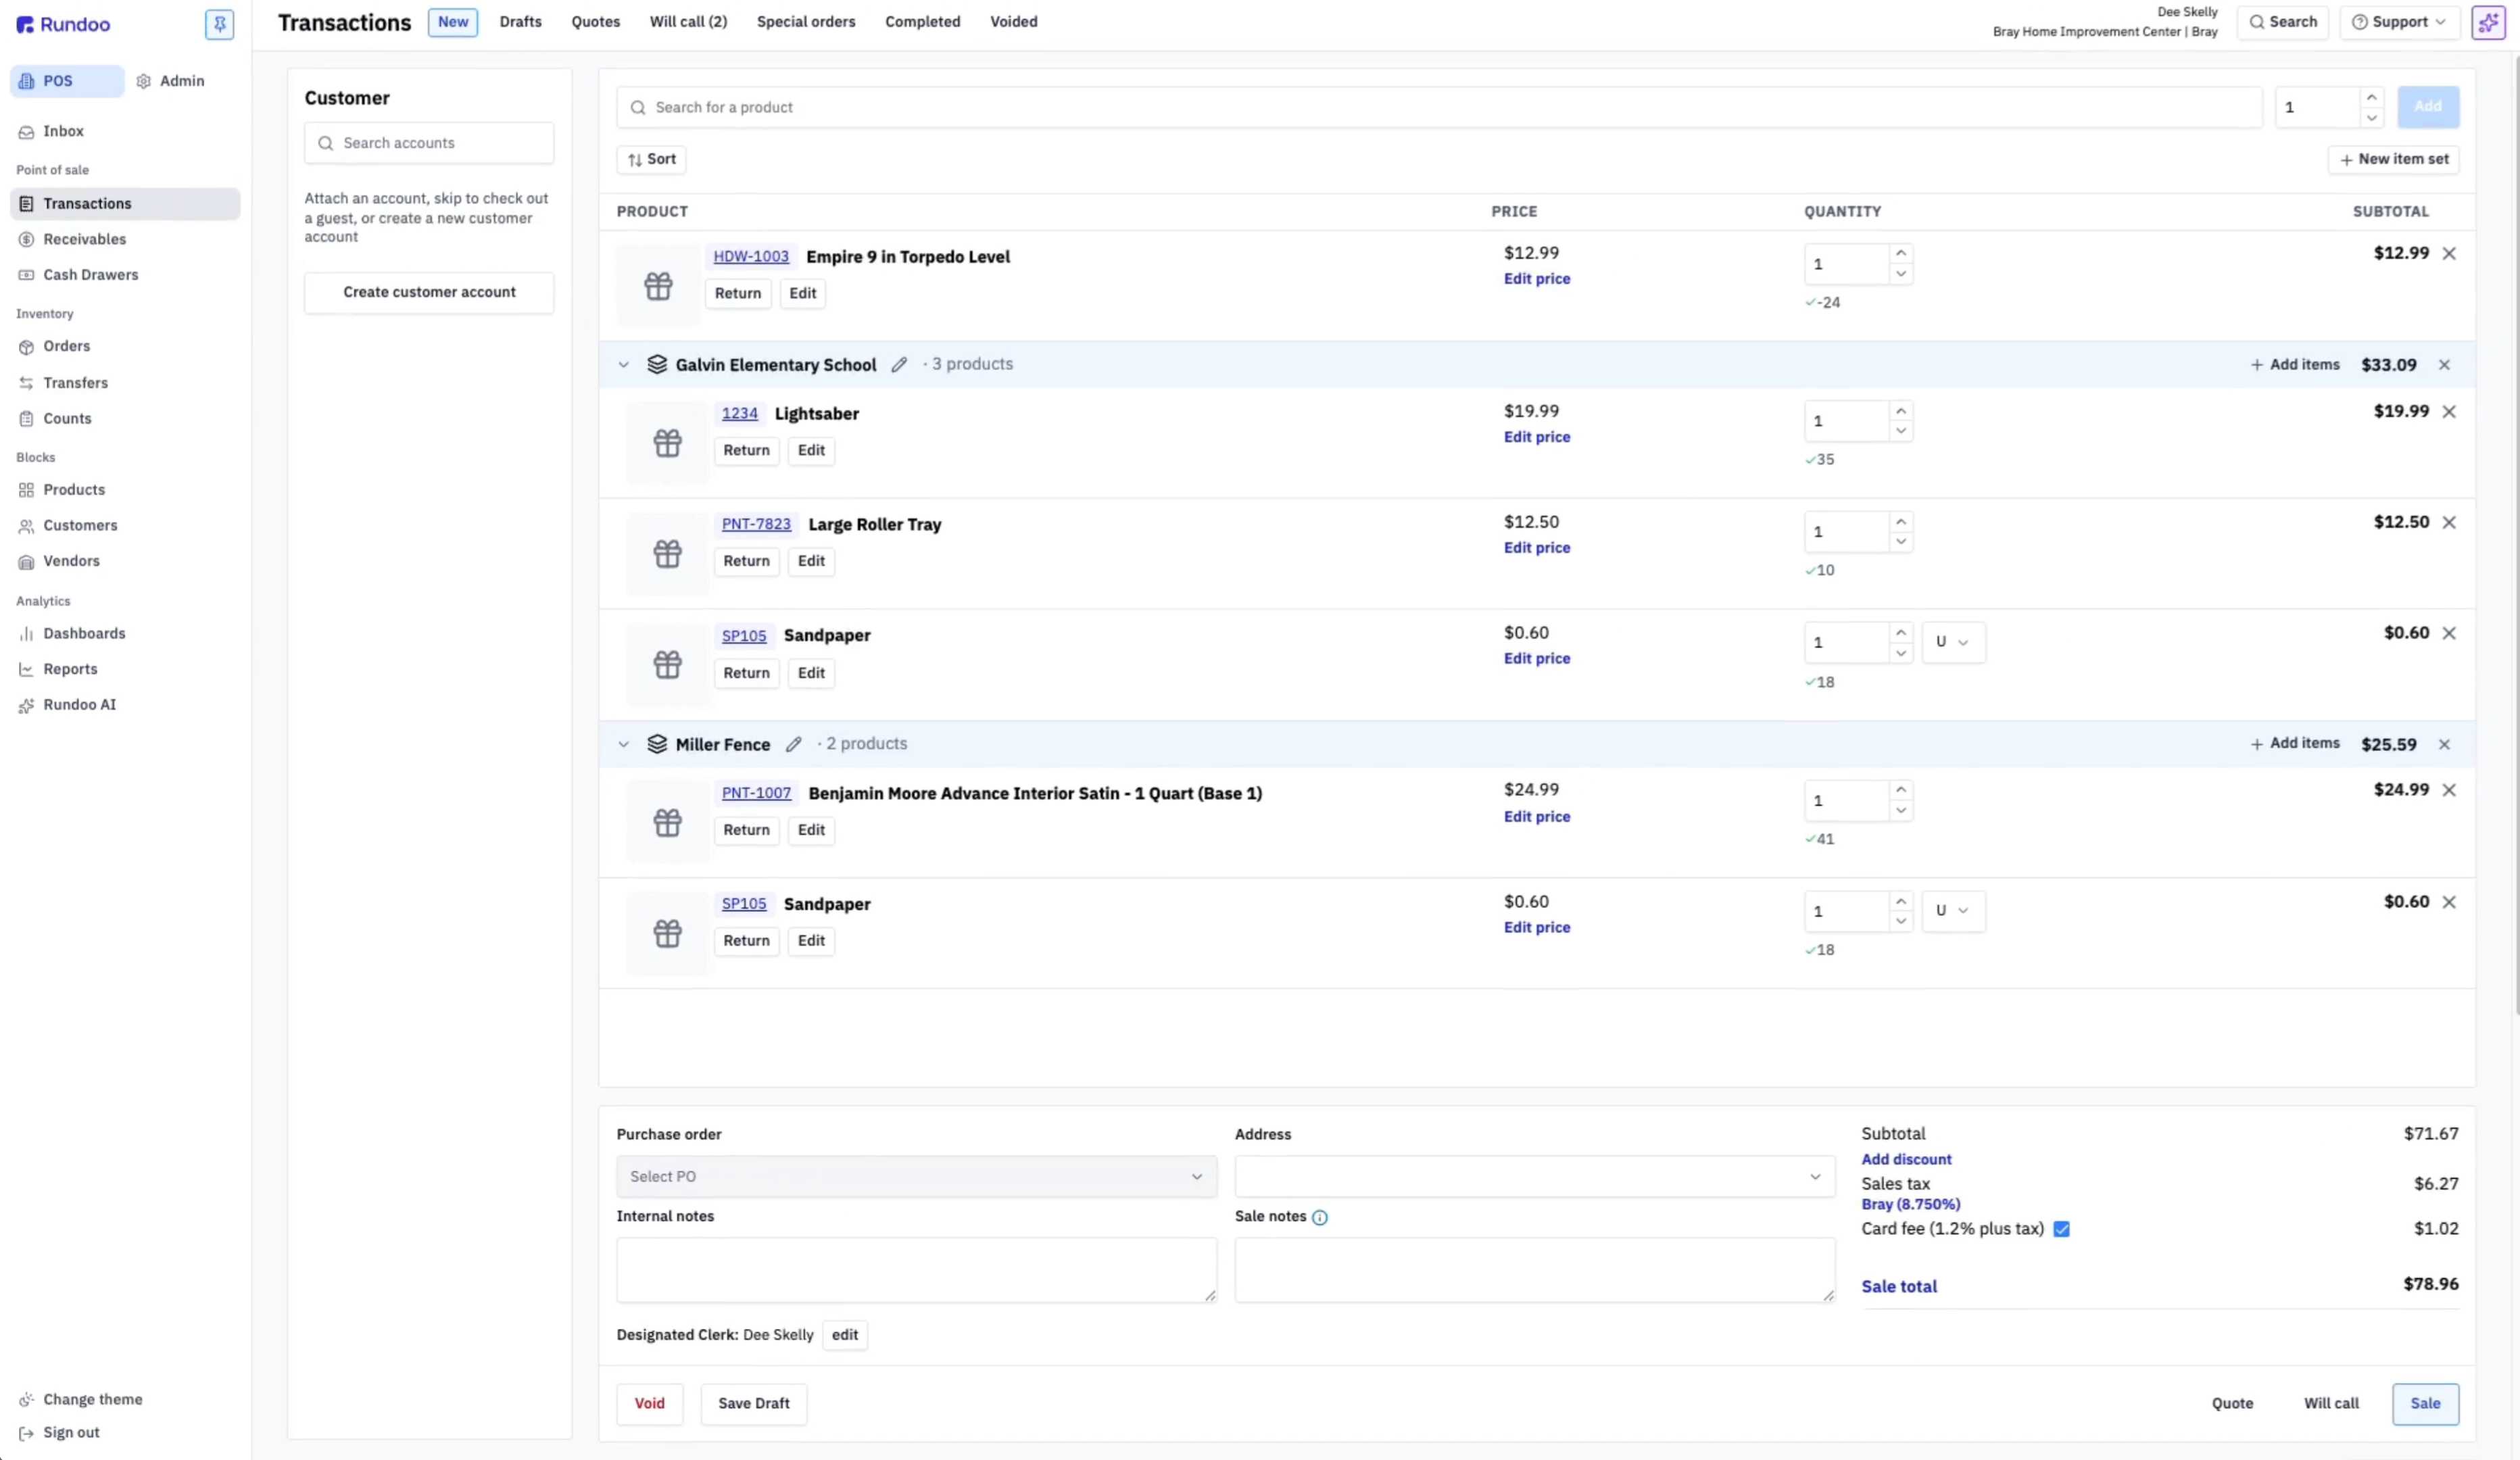
Open a new sale under POS → Transactions → New. Attach the customer on the left if you want, the same as any other ticket. You do not have to decide about sets ahead of time. You can start grouping whenever you like.
Up above the cart, click New item set. Type the name of the first job, say "Galvin Elementary School," then choose New item set: Galvin Elementary School. A header row appears for that group, and a blue Adding to: Galvin Elementary School tag pins to the top of the cart. That tag is your reminder that anything you add now goes into this set.
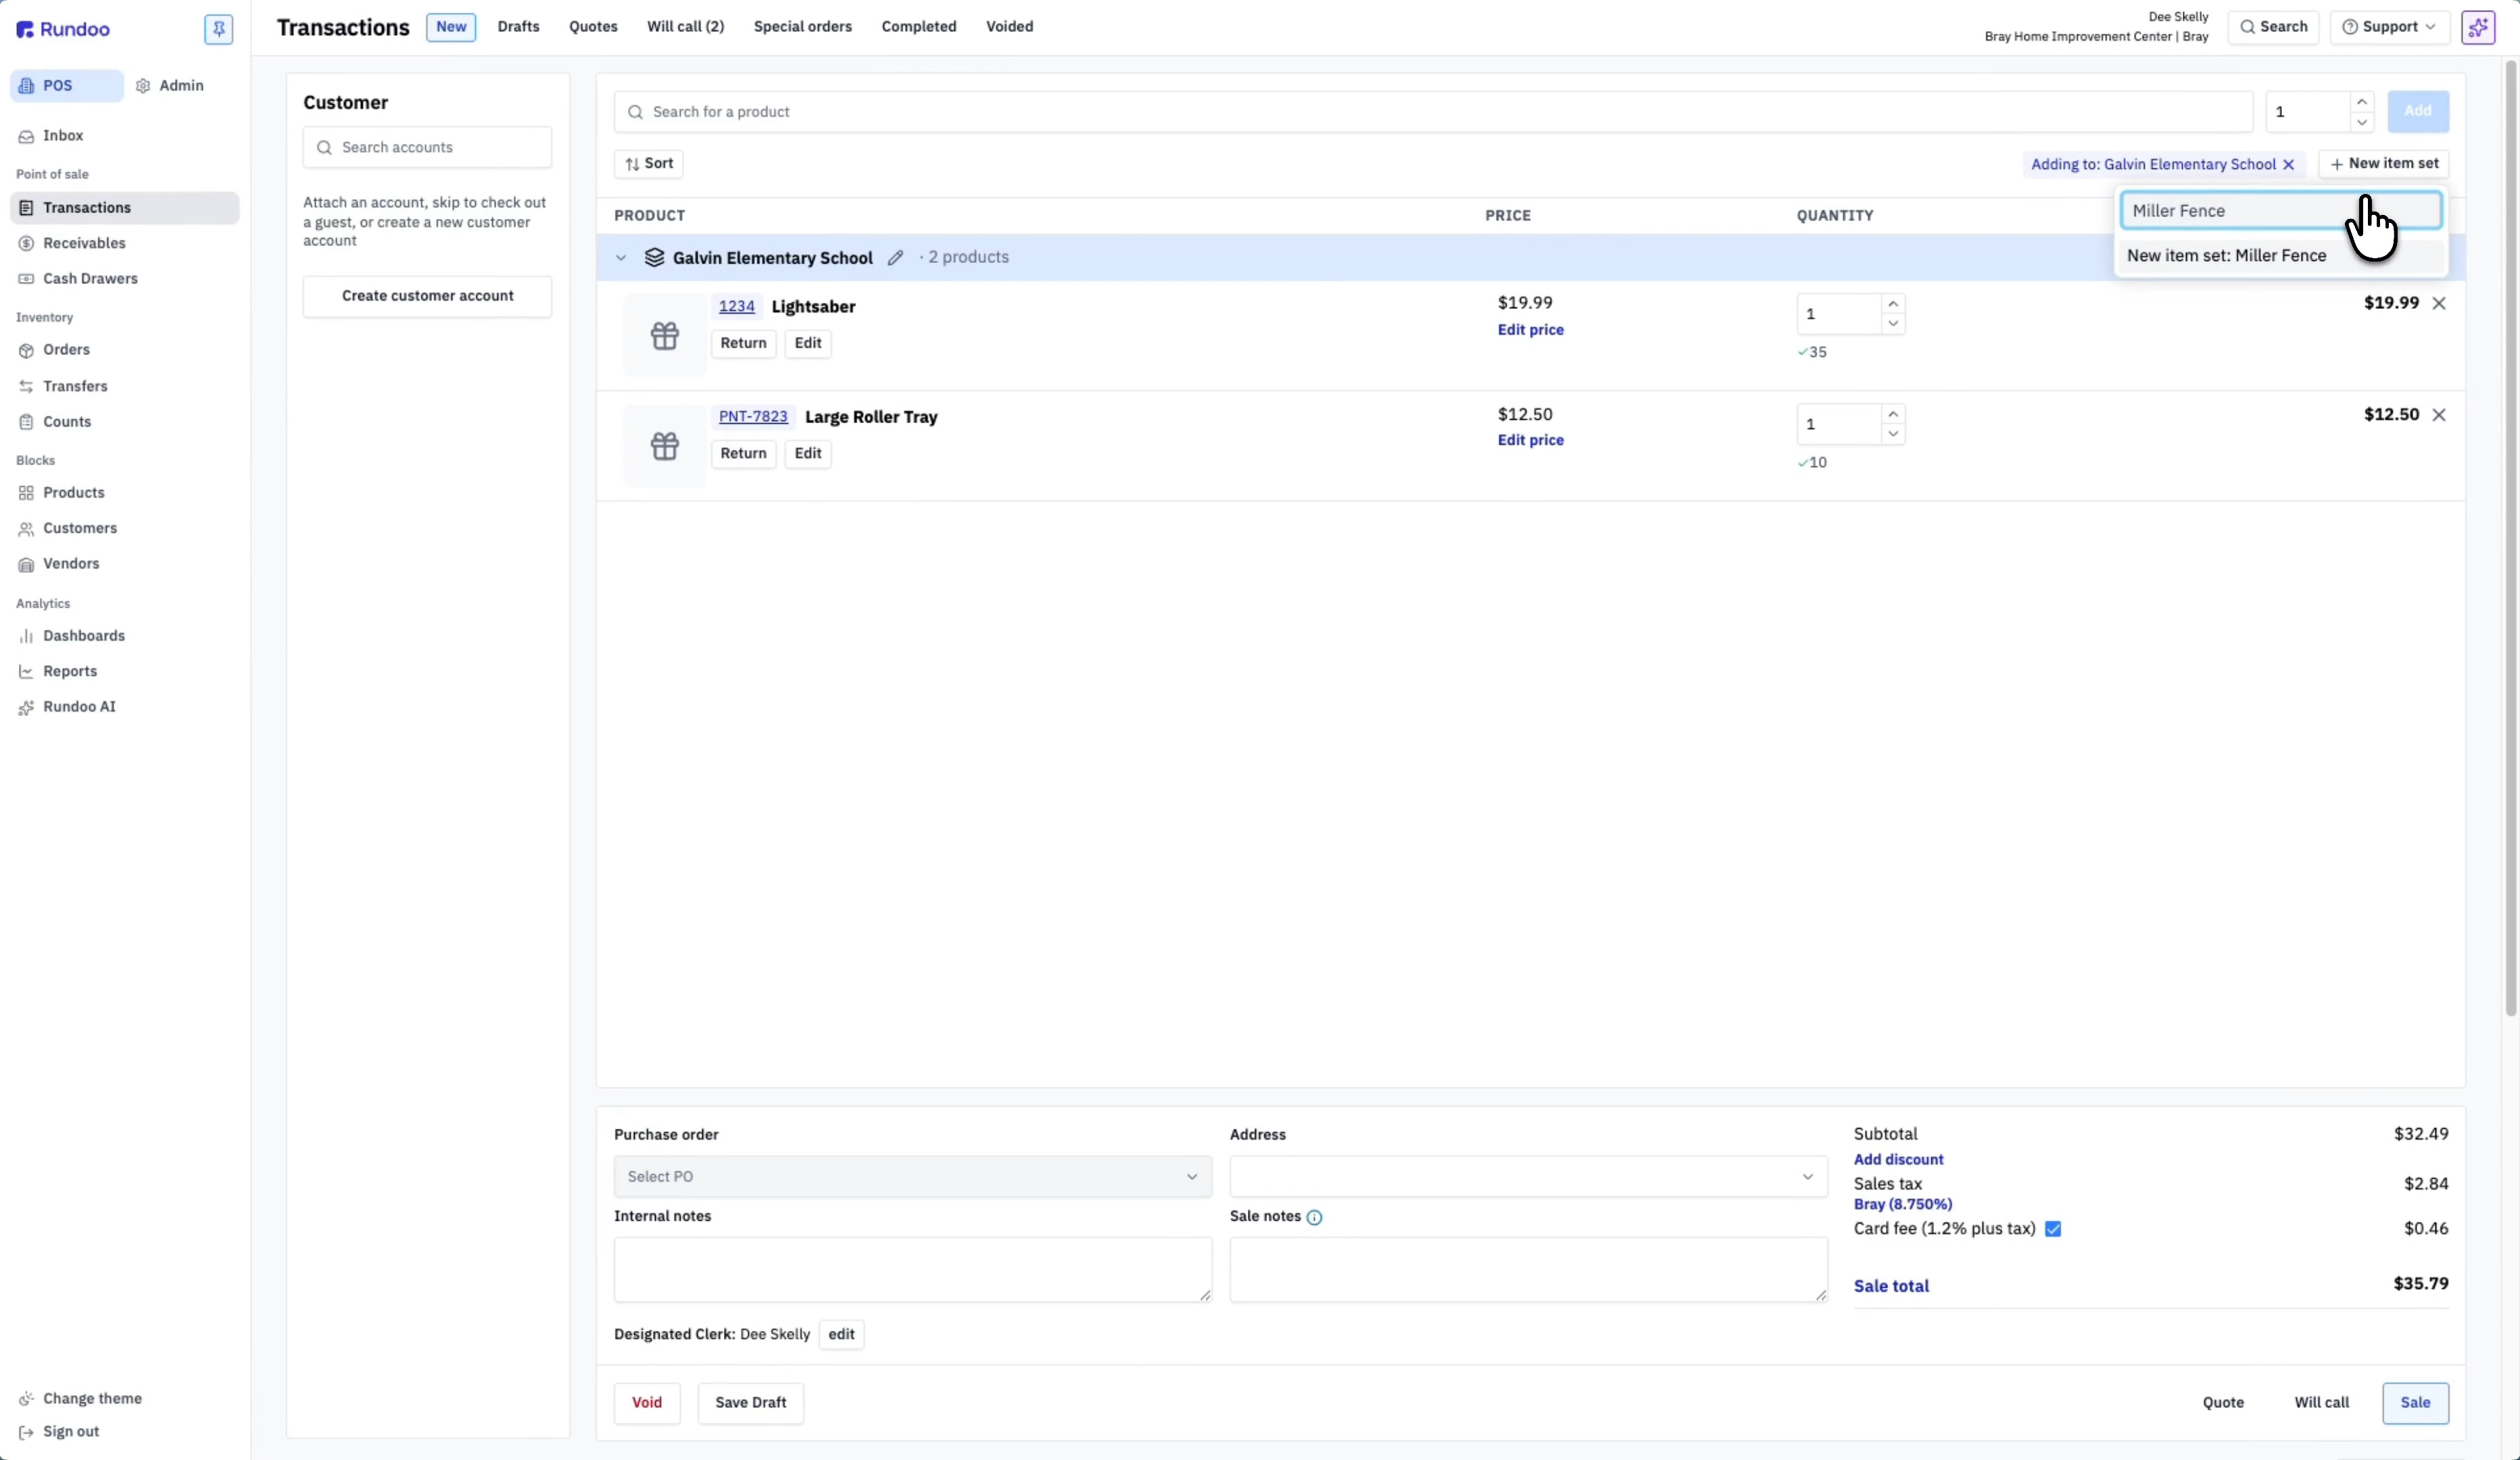
Search and add products the way you always do. Each one lands under the active set automatically, indented beneath its header. No dragging, no sorting at the end. Everything stays organized right from the start.
Click New item set again, type "Miller Fence," and create it. Notice the blue tag switches over. Miller Fence is now the active set, so the items you add next land there instead. To jump back to an earlier set, click Add items on that set's header. The active set always reads Selected.
If the customer grabs something for themselves, like a level, click the X on the "Adding to" tag first so no set is active, then ring it up. It sits on its own at the top, above the sets. And if a product is needed for both jobs, like a primer, just make the right set active and add it to each. Rundoo keeps them as two separate lines, one per job.
These two X buttons do different things, so it is worth knowing which is which. The X next to a single line deletes that item from the sale completely. The X on a set's header only removes the group. It asks you to confirm, then the items themselves are safe. They just move back up to the ungrouped top of the cart. Nothing is lost. To rename a set, click the pencil on its header.
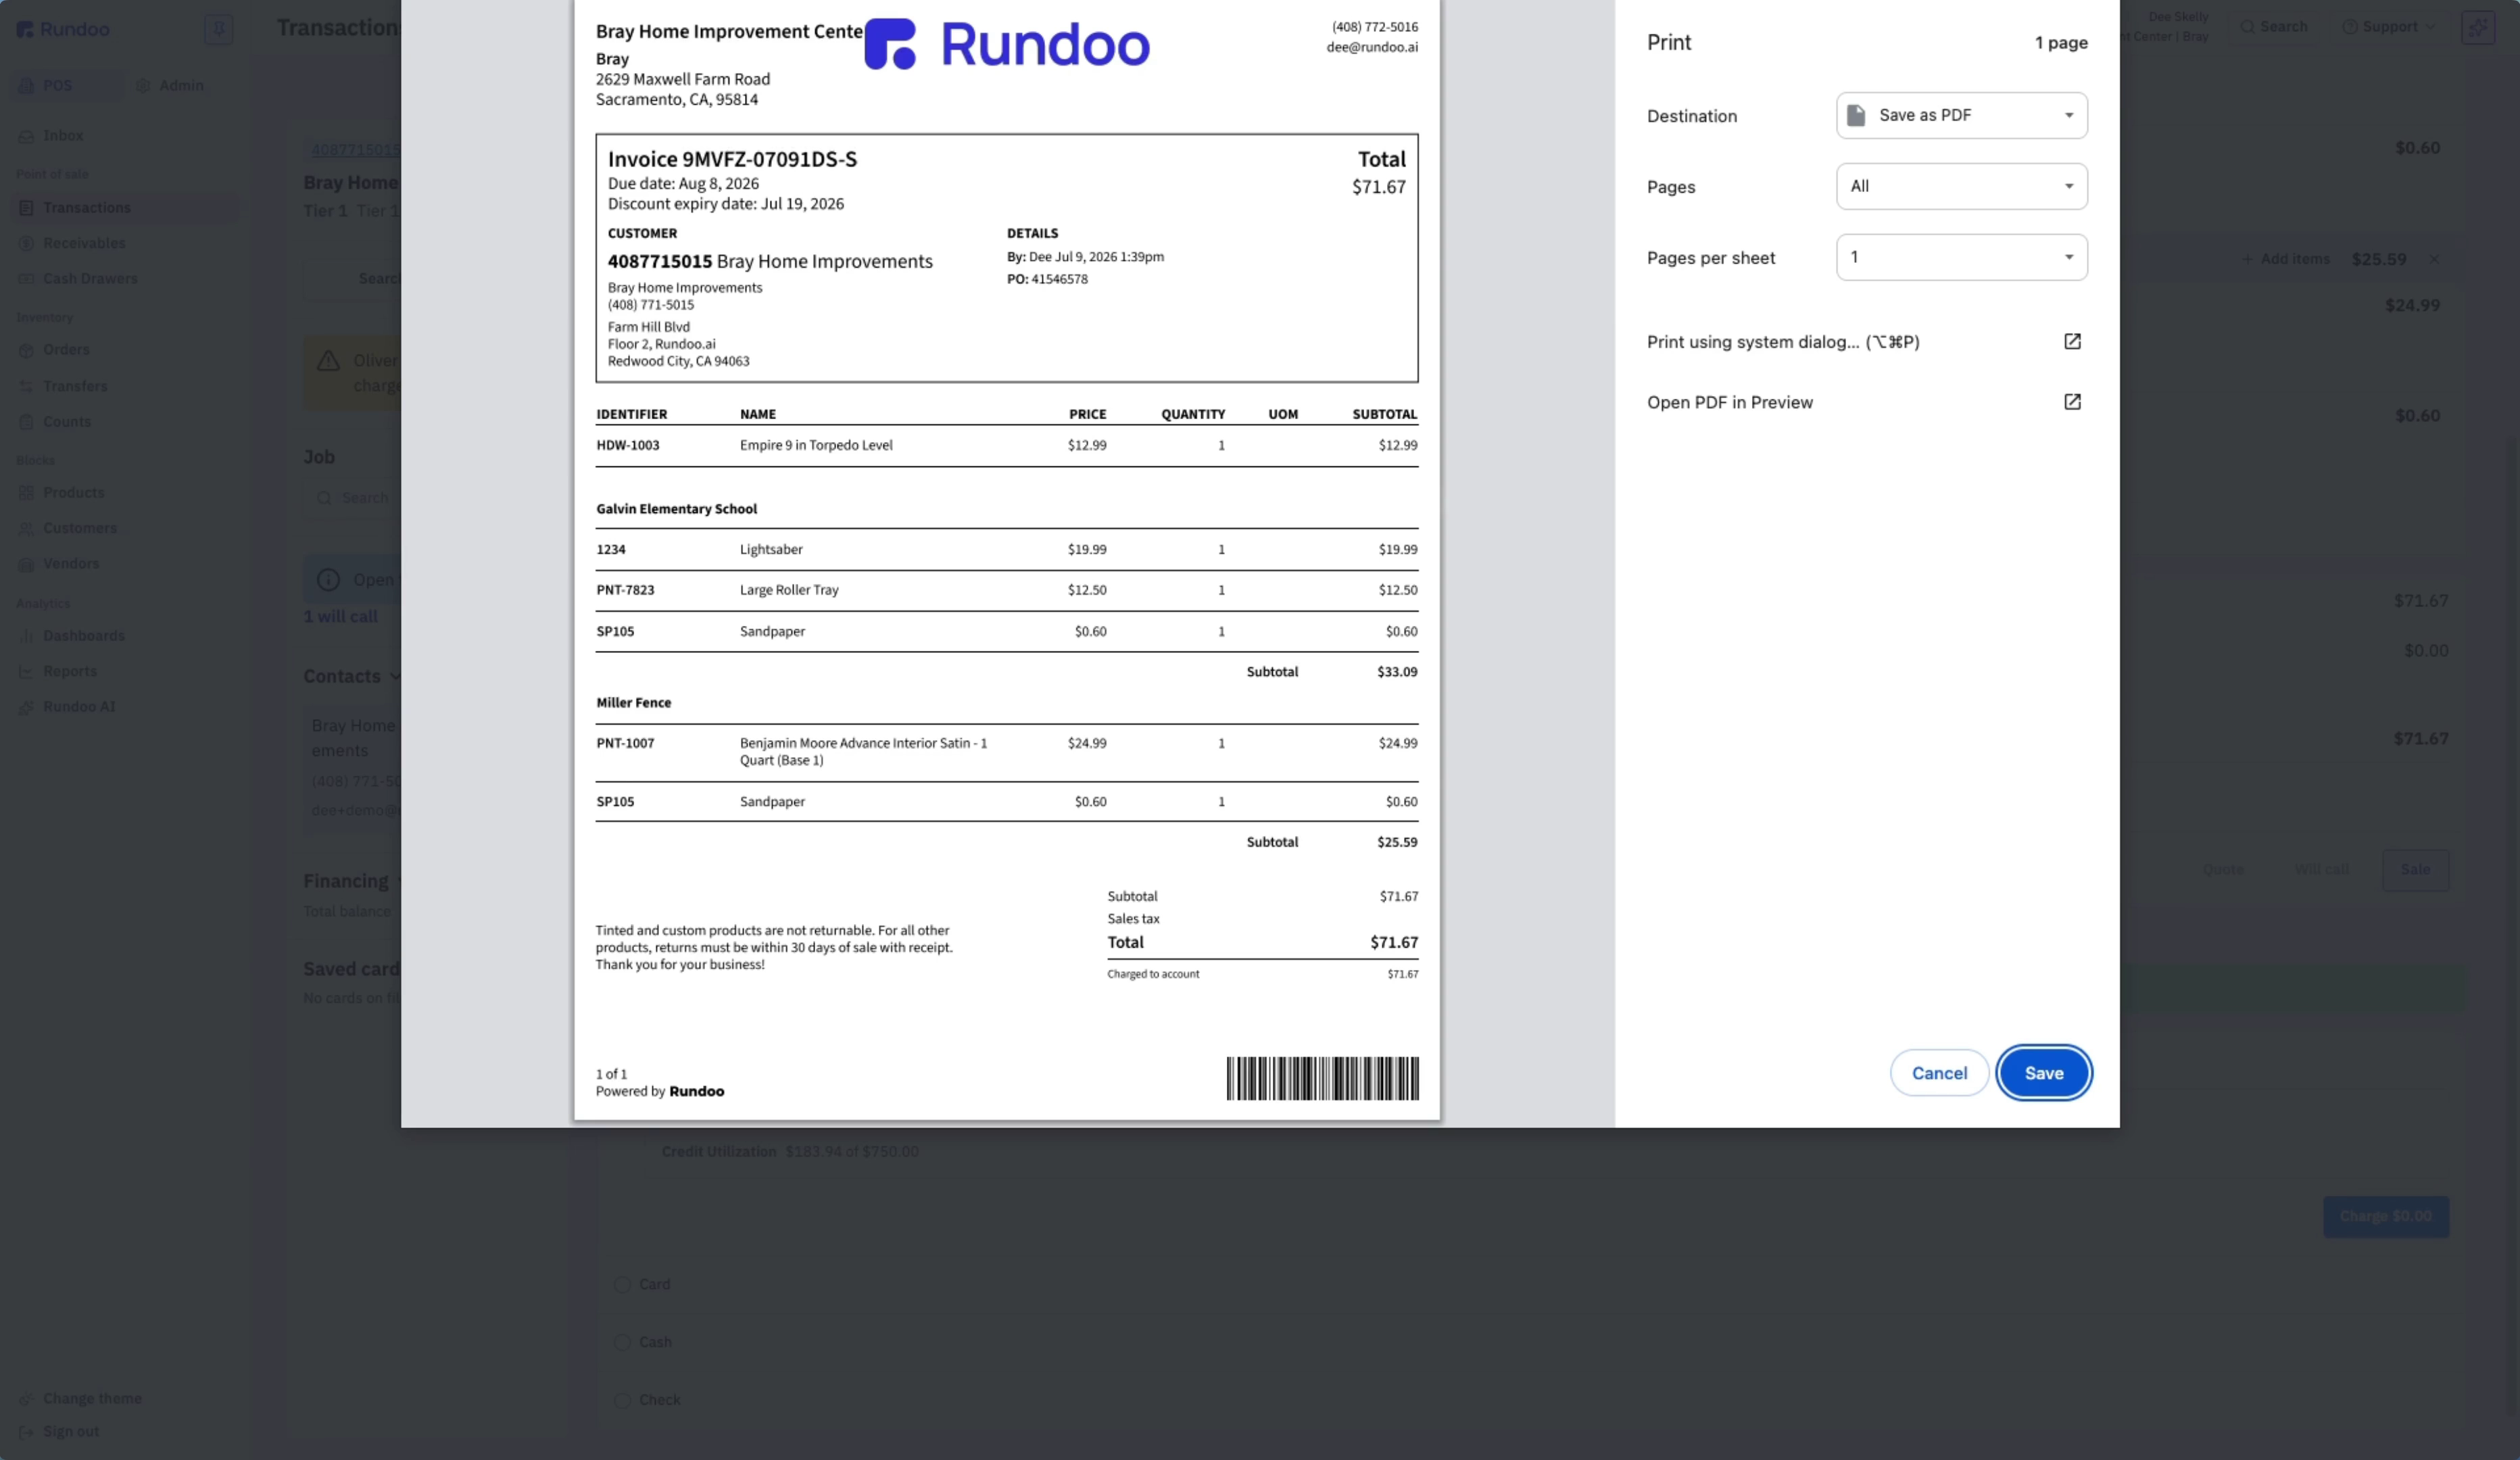
Save the ticket as a quote, draft, or will-call from the bottom of the screen, and every set comes along (empty sets quietly drop off). When you take payment and print the receipt, each set prints as its own section with its own subtotal, exactly what your contractor needs to bill each job. The groups keep riding with that sale into the completed record, returns, and special orders too.
Create a set
New item set → type a name
It becomes the active target right away.
Switch sets
Add items on a header
The active set reads "Selected."
Ungrouped item
Clear the "Adding to" tag
It rides on top, above every set.
On the receipt
One section per set
Each with its own subtotal.
Good to know